
 Save 15% on your 1st Autoship learn more

 Email us
 Live Chat
 FAQs
FAQs





Introduction
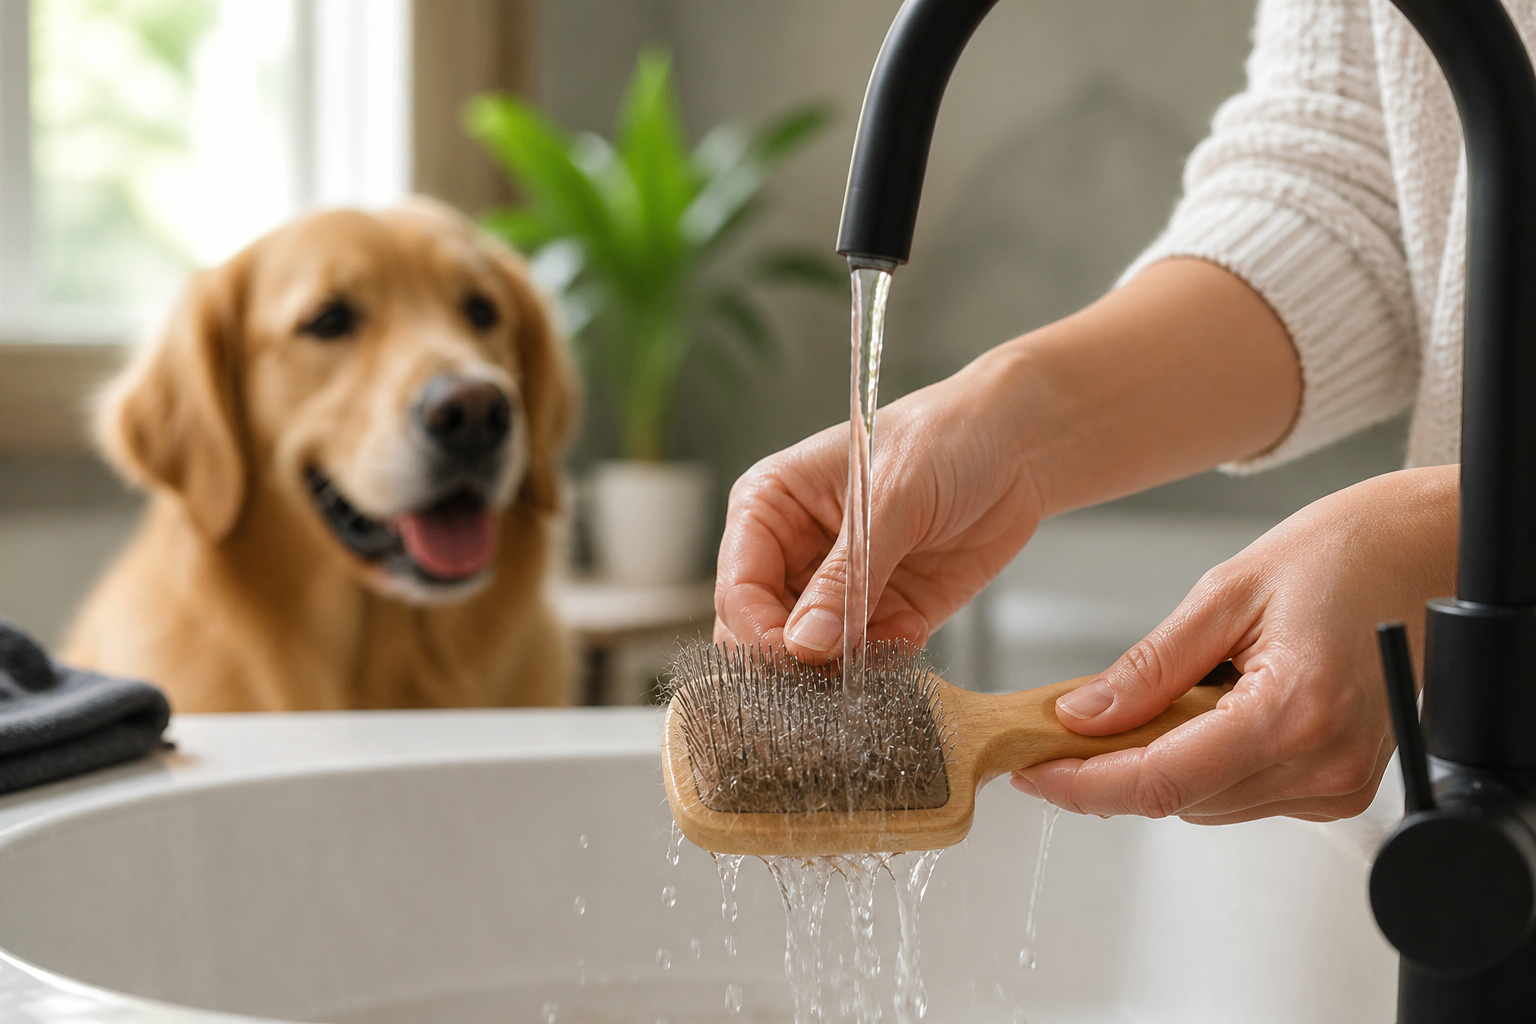
You just finished a long grooming session and your dog looks fantastic. Their coat is shiny and the shedding is finally under control. Then you look down at the brush. It is packed with loose fur, gray dander, and oily residue from your pet's skin. If you put that brush back in the drawer without cleaning it, you are simply saving that dirt for the next time you groom. Using a dirty tool can lead to skin irritation or even the spread of bacteria.
At BaxterBoo, we know that the right tools make all the difference in your pet care routine. We have seen how a well-maintained brush lasts longer and performs better. This guide will walk you through the practical steps to deep clean every type of dog brush in your collection. You will learn the best solutions for disinfecting tools and how to dry them safely. A clean brush is a vital part of keeping your dog healthy and comfortable.
Why Cleaning Your Dog Brush Is Necessary
Many pet owners overlook the hygiene of their grooming tools. It is easy to think that a quick pull of the hair is enough. However, dog brushes collect more than just fur. They trap skin oils, dead skin cells, environmental dust, and even microscopic pests or pollen. When you use a dirty brush, you are redepositing these materials onto your dog's clean skin.
Dirty brushes can also become a breeding ground for bacteria and yeast. This is especially true if you brush your dog while they are still slightly damp after a bath. Moisture trapped in the bristles or the rubber pad of a brush can lead to mold growth. If your dog has sensitive skin or allergies, a dirty brush can trigger a flare-up.
Regular cleaning also preserves the life of your gear. High-quality brushes from brands like Kong or RC Pets are investments. Dust and oils can break down rubber pads and cause metal pins to rust over time. By keeping them clean, you ensure the bristles stay flexible and the handles remain sturdy for years.
Quick Answer: Clean your dog brush by removing hair with a comb, soaking it in a solution of warm water and pet shampoo or vinegar for 20 minutes, and rinsing it thoroughly. Always dry brushes with the bristles facing down to prevent water from trapping in the handle or pad.
Preparing Your Cleaning Station
Before you begin, gather your supplies. You do not need expensive chemicals to get a deep clean. Most items are likely already in your pantry or laundry room.
- Warm water: Use a basin or a clean sink.
- Pet shampoo: A mild, organic pet shampoo is ideal. Avoid human shampoos with heavy fragrances.
- White vinegar or Apple Cider Vinegar: This helps break down oils and acts as a mild disinfectant.
- An old toothbrush: This is the perfect tool for scrubbing between tight bristles.
- A fine-tooth comb: This helps you rake out the deep-seated hair that fingers cannot reach.
- A clean towel: Choose one that is lint-free.
- Disinfectant spray: For tools that need a sterile finish.
If your dog is currently managing a skin condition, your veterinarian might recommend specific disinfecting protocols. Our dog grooming collection carries shampoos, wipes, brushes, and other care supplies. If you are dealing with a fungal or bacterial skin infection, cleaning your tools after every single use is a mandatory part of the treatment plan.
Step 1: Remove the Hair
The first step in cleaning any dog brush is removing the physical debris. This is often the most tedious part. If you have a slicker brush, the hair can become felted at the base of the pins.
Start by using your fingers to pull away the largest clumps. For the hair that is stuck near the pad, use a metal comb or a toothpick. Gently slide the comb under the layer of hair and lift upward. Be careful not to pull too hard on the pins, as you do not want to bend them or pull them out of the backing.
For bristle brushes, the hair tends to weave itself into the fibers. A fine-tooth comb works best here. Run the comb through the bristles in the same direction they grow. If you have a rubber curry brush, the hair usually sits on the surface and can be wiped away with a damp cloth.
Step 2: Create Your Cleaning Solution
Once the hair is gone, you need to tackle the oils and dander. Fill a bowl with warm water. You do not want the water to be boiling, as extreme heat can warp plastic handles or damage the glue holding the bristles in place.
Add two tablespoons of pet shampoo to the water and stir until it is sudsy. Alternatively, you can use a mixture of half water and half white vinegar. Vinegar is excellent for cutting through the waxy sebum that dogs produce. It also helps neutralize any "doggy" odors that have moved from the coat to the brush.
Key Takeaway: Using pet-specific shampoo for cleaning tools is safer than using dish soap. Dish soap can be too harsh for some brush materials and may leave a residue that irritates a dog with sensitive skin.
Step 3: Soaking and Scrubbing
The soaking process varies depending on the material of your brush.
Plastic and All-Synthetic Brushes
If the brush is made entirely of plastic and synthetic bristles, you can submerge it completely. Let it soak for 15 to 20 minutes. This gives the soap time to loosen the skin cells and environmental grime. After soaking, use the old toothbrush to scrub the base of the bristles.
Wood-Handled Brushes
Never soak a wooden brush. Prolonged exposure to water will cause the wood to swell, crack, or rot. Instead, dip only the bristles into the cleaning solution. Hold the brush so the wooden handle stays dry. Use your toothbrush to clean the area where the bristles meet the wood.
Brushes with Rubber Pads
Many pin brushes and slicker brushes have a soft rubber pad that holds the pins. These pads often have a small air hole. If you submerge the brush, water will get inside the pad. This leads to trapped moisture and mold. For these, dip only the pins into the water. Use a damp cloth to wipe the rubber pad and use your scrubbing brush to clean around the base of each pin.
Step 4: Rinsing Thoroughly
After scrubbing, you must remove all traces of the cleaning solution. Rinse the brush under a stream of lukewarm running water. For brushes with pads, point the pins downward while rinsing. This prevents water from being forced into the air hole.
Continue rinsing until the water runs clear and you no longer see soap bubbles. If you used a vinegar solution, the smell will dissipate as the brush dries. If you notice any lingering dirt, repeat the scrubbing step before the final rinse.
Step 5: The Drying Process
Drying is the most critical step for preventing damage. Most people make the mistake of leaving a brush bristle-side up on the counter. This allows water to drain down the pins and settle into the handle or the rubber backing.
Place your brushes on a clean towel with the bristles facing down. This allows gravity to pull the moisture away from the internal components of the brush. If you have a dish rack, you can prop the brushes up at an angle.
Avoid using a hairdryer or placing brushes near a direct heat source like a radiator. Excessive heat can make plastic brittle and cause rubber to lose its elasticity. Allow the brush to air dry completely. This may take 12 to 24 hours depending on the humidity in your home.
Vet Tip: If your dog is prone to hot spots or recurring skin infections, consult your veterinarian about a medical-grade disinfectant for your tools. We provide access to prescription-strength skin care through our pharmacy and Pet's Choice partnership to help manage these chronic issues.
Deep Disinfection for Health Concerns
There are times when a simple soap and water wash is not enough. If you have multiple pets, you should disinfect your brushes to prevent cross-contamination. This is also necessary if you have recently dealt with fleas, ticks, or ringworm.
You can create a sanitizing soak using a 10% bleach solution (one part bleach to nine parts water). Only use this on hard plastic tools. Do not use bleach on natural bristle brushes or those with wooden handles, as it will destroy the materials. Soak the plastic tools for ten minutes, then rinse them several times to ensure no bleach residue remains.
For more delicate tools, a 70% isopropyl alcohol wipe can be used. Wipe down the handle and the bristles, then allow the alcohol to evaporate completely. This is a quick way to sanitize between uses if you are grooming more than one dog in the same afternoon.
Maintaining Different Types of Brushes
Not all brushes are created equal. Different materials require specific care to stay in top shape.
Slicker Brushes
These feature fine, short wires close together. They are prone to rusting if they are not dried perfectly. After cleaning, you might want to use a can of compressed air to blow out any water trapped in the pad. Check the pins regularly to ensure they have not become sharp or bent, which could scratch your dog's skin.
Bristle Brushes
Natural bristles can hold onto oils more than synthetic ones. They may require a second wash with a degreasing pet shampoo. Since natural hair is porous, it takes longer to dry. Ensure these are kept in a well-ventilated area.
Rubber Curry Brushes
The KONG Zoom Groom Natural Rubber Dog Grooming Brush and similar rubber tools are the easiest to maintain. These can often be washed in the top rack of a dishwasher on a cool cycle. However, hand washing is always the safest bet to ensure the longevity of the rubber.
Undercoat Rakes and De-shedding Tools
These tools often have metal blades or teeth. It is vital to keep these dry to prevent corrosion. After cleaning, you can apply a tiny drop of mineral oil to a cloth and wipe the metal parts. This creates a barrier against moisture.
When to Replace Your Dog Brush
Even with perfect care, every grooming tool has a lifespan. Using a worn-out brush can be ineffective and uncomfortable for your pet. Inspect your tools monthly for signs of wear.
- Missing Pins: If a pin brush is losing its teeth, the remaining pins may have uneven pressure, causing discomfort.
- Bent Slicker Wires: Bent wires can snag on tangles and pull painfully at the skin.
- Cracked Rubber: If the pad is cracking, it can trap bacteria and moisture that you cannot clean out.
- Split Wood Handles: Cracks in wood can harbor mold and may pinch your hand during use.
- Softened Bristles: If a bristle brush feels limp and no longer moves through the coat, it is time for a new one.
If you notice these signs, it is time to browse our dog brushes and combs. Our frequent buyer program can help you save on top-tier brands when you need to refresh your kit.
Storage Tips for Longevity
Where you store your brushes is just as important as how you clean them. Many people keep grooming supplies in the bathroom, but high humidity can lead to rust and mold.
Store your tools in a cool, dry place. A dedicated grooming kit or a plastic bin in a hallway closet is a better choice than under the bathroom sink. If you live in a very humid climate, consider adding a small silica gel packet to your storage bin to absorb excess moisture.
Keep brushes away from your dog when not in use. Some dogs view the texture of a brush handle or the scent of a rubber pad as a chew toy. A few minutes of chewing can ruin a high-quality brush and potentially lead to a dangerous foreign body ingestion.
A Routine for Success
Cleaning your dog's brush should not be a once-a-year event. For the best results, follow this schedule:
- After every use: Remove all visible hair and debris.
- Weekly: Wipe down the handle and the back of the brush with a damp cloth.
- Monthly: Perform a deep soak and scrub as described above.
- After illness: Disinfect the brush immediately if your dog has had any skin issues or parasites.
By staying on top of this routine, you make grooming a more hygienic and pleasant experience. Your dog will have a cleaner coat, and you will save money by not having to replace damaged tools prematurely.
Key Takeaway: Proper tool maintenance is a simple habit that protects your pet's skin health and extends the life of your grooming gear.
Conclusion
Cleaning your dog brush is a straightforward process that offers significant benefits. By removing dander, oils, and bacteria, you ensure that every grooming session truly cleans your dog rather than just moving dirt around. Whether you are using a slicker brush, a bristle brush, or a de-shedding rake, the combination of a thorough soak and proper drying will keep your tools in peak condition.
Remember to inspect your brushes regularly and replace them when they show signs of damage. If you ever notice unusual skin irritation on your dog, consult your veterinarian to rule out infections. We are here to support your pet care journey with a wide selection of grooming gear and professional pharmacy services.
Step 1: Clear the clutter.
Remove all hair from the bristles using your fingers or a metal comb.
Step 2: Wash.
Soak plastic tools in warm water and pet shampoo for 20 minutes; scrub with a toothbrush.
Step 3: Dry.
Lay the brush on a towel with the bristles facing downward to prevent water damage.
Bottom line: A clean brush leads to a healthier coat and a happier dog, so make tool maintenance a regular part of your pet care routine.
FAQ
Can I use the dishwasher to clean my dog's brush?
While some all-rubber brushes like the Kong ZoomGroom are dishwasher safe, most dog brushes are not. The high heat and intense water pressure can melt plastic, warp wood, and damage the glue that holds bristles in place. It is always safer to hand wash your grooming tools to prevent them from breaking or losing their effectiveness.
How do I get the smell out of a dog brush?
If your brush has a lingering "doggy" odor, a vinegar soak is the most effective solution. Mix equal parts white vinegar and warm water and let the bristles soak for about 15 minutes. Vinegar is a natural deodorizer that breaks down the oily sebum responsible for the smell. Once the brush dries completely, the vinegar scent will vanish along with the unwanted odors.
Is it okay to use human hairbrush cleaners on pet brushes?
You can use the physical tools designed for cleaning human hairbrushes, such as rakes or specialized combs, to remove fur from dog brushes. However, avoid using chemical cleaning solutions or sprays made for human brushes. These products often contain perfumes or harsh alcohols that can leave a residue on the bristles, which might irritate your dog's skin or cause an allergic reaction.
Why did my dog's slicker brush start to rust?
Rust occurs when water is trapped against the metal pins for an extended period. This usually happens if the brush is stored in a damp place or if it was dried with the pins facing upward, allowing water to pool in the rubber pad. To prevent rust, always dry your slicker brush with the pins facing down and store it in a dry, low-humidity environment.






