
 Save 15% on your 1st Autoship learn more

 Email us
 Live Chat
 FAQs
FAQs





Introduction
You are sitting on the rug with your dog when they let out a big yawn. Instead of the usual puppy breath, you catch a whiff of something much sharper and more metallic. When you lift their lip, you see a thick layer of yellow-brown tartar cemented near the gum line. This is the moment many pet owners start looking for professional-grade solutions they can use at home.
At BaxterBoo, we know that keeping up with oral hygiene is one of the biggest challenges of pet ownership. Ultrasonic cleaners have become a popular tool for owners who want to go beyond basic brushing. These devices use high-frequency vibrations to break apart stubborn buildup without the aggressive scraping of traditional metal tools. This post covers how to safely introduce this technology to your routine and why it must be paired with professional veterinary care. Understanding the mechanics of these tools ensures you support your dog's health without accidentally causing pain or damage.
Understanding Ultrasonic Technology for Dogs
An ultrasonic cleaner is a device that uses sound waves to create microscopic vibrations. When the metal tip of the scaler touches a hard surface like tartar, the vibrations shatter the bond between the buildup and the tooth enamel. This process is generally more efficient than manual scaling. Manual scaling requires a lot of physical pressure which can lead to slips and gum injuries. The ultrasonic method relies on the speed of the vibration rather than the strength of your hand.
Most home units are designed to be "silent" to human ears. However, dogs have much more sensitive hearing than we do. They may be able to hear a high-pitched whine or feel a buzzing sensation in their jawbone during the process. It is important to distinguish between a true ultrasonic cleaner and a simple vibrating tooth scaler. True ultrasonic devices often only activate when they touch a hard surface like a tooth. This helps protect the soft tissues of the mouth from accidental friction.
Quick Answer: Ultrasonic cleaners use high-frequency vibrations to break up tartar and plaque on the tooth surface. They are more efficient than manual scraping but require a calm dog and a steady hand to avoid damaging the enamel.
The Difference Between Home and Professional Cleaning
It is tempting to think that an ultrasonic device replaces the need for a trip to the vet. This is a dangerous misconception. When a veterinarian performs a dental cleaning, the dog is under general anesthesia. This allows the vet to clean the "sub-gingival" area, which is the space hidden under the gum line. This is where the most harmful bacteria live and where periodontal disease starts.
Home ultrasonic cleaning is strictly "supragingival." This means you are only cleaning the parts of the tooth you can see. While this makes the teeth look white and pearly, it does not treat infections or buildup hidden under the gums. Using these tools at home is a cosmetic and maintenance step. It is a way to extend the time between professional cleanings, not a way to cancel them.
Vet Tip: Always have your veterinarian perform a full oral exam before you start using an ultrasonic cleaner. They need to check for loose teeth, deep pockets of infection, or fractured enamel that could be extremely painful if touched by a vibrating tool.
For additional warning signs, review our guide to recognizing bad teeth in dogs.
Preparing Your Dog for the Sensation
You cannot simply turn on a vibrating metal wand and put it in your dog's mouth without preparation. Most dogs will find the sensation strange or even frightening. You should spend at least a week getting them used to the device before you ever attempt to clean a tooth. This process is called desensitization.
Start by letting your dog sniff the device while it is turned off. Give them a high-value treat every time they interact with it. Once they are comfortable, turn the device on so they can hear the hum. Do not touch them with it yet. Just let it run while they eat a treat nearby. This associates the sound with something positive.
Step 1: Introduction / Let the dog sniff the tool while it is off and reward them with praise.
Step 2: Sound Familiarization / Turn the device on across the room. Gradually move it closer over several days while feeding treats.
Step 3: Vibration Comfort / Touch the handle of the vibrating device (not the tip) to your dog's shoulder or leg so they feel the buzz.
Step 4: Mouth Handling / Practice lifting their lips and touching their teeth with your finger or a soft toothbrush.
Step 5: First Contact / Touch the blunt side of the tip to a large canine tooth for just one second then stop and reward.
How to Clean Dogs Teeth with Ultrasonic Cleaner
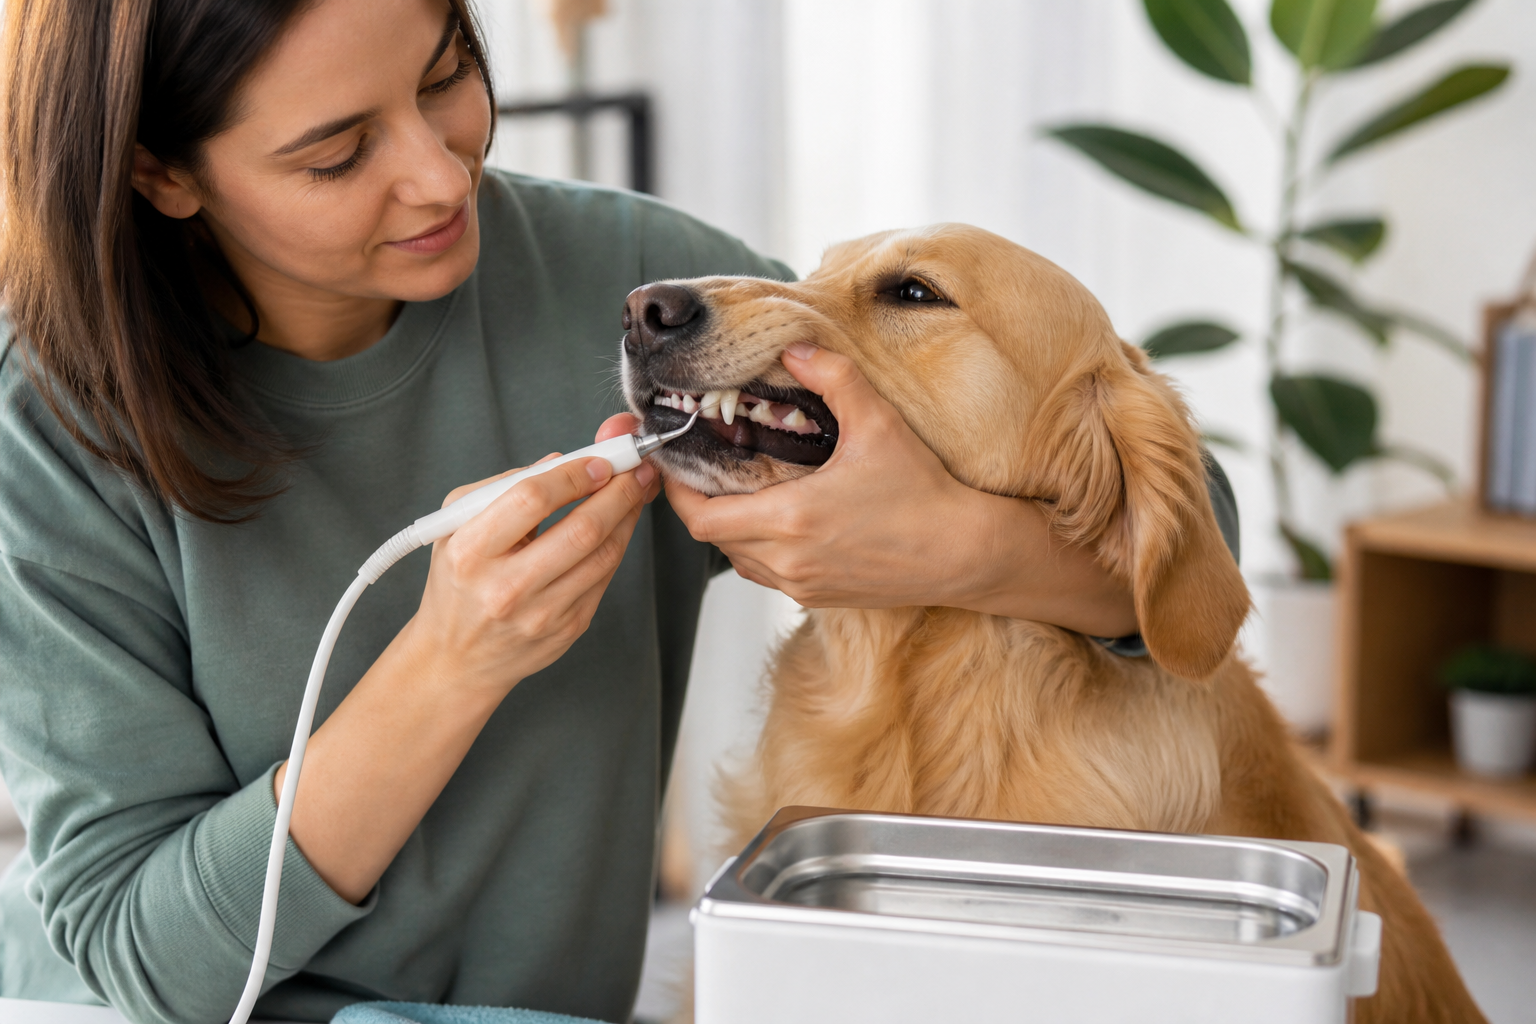
Once your dog is calm and used to the tool, you can begin the actual cleaning process. You should work in very short sessions. Do not try to clean every tooth in one sitting. Aim for one or two teeth per day until you both become experts.
Hold the device like a pen. You want a light, flexible grip rather than a tight fist. This allows you to react quickly if your dog moves their head. The tip should be held at a 45-degree angle to the tooth surface. Never point the sharp tip directly into the gum or at the tooth at a 90-degree angle.
Move the tip in a constant, light, sweeping motion. You should never hold the tip on one spot for more than a few seconds. Even though the vibrations are tiny, they can generate heat. Holding the tool in one place for too long can overheat the tooth pulp and cause permanent damage. If the tartar is thick, it might "pop" off in a large chunk. If it does not come off easily, stop and move to a different tooth.
Essential Safety Precautions
The enamel on a dog's teeth is actually thinner than human enamel. This means you must be incredibly careful not to wear it down. If you use too much pressure or the wrong angle, you can create microscopic scratches. These scratches actually give bacteria more places to hide, which makes tartar return even faster than before.
Water is an important part of professional ultrasonic scaling. Vets use a constant spray of water to cool the tooth and wash away debris. Most home units do not have a built-in water sprayer. You must provide this yourself. Use a wet gauze pad or a small spray bottle to keep the tooth moist. This prevents heat buildup and helps you see your progress.
Key Takeaway: Never use an ultrasonic cleaner on a dog with red, inflamed, or bleeding gums. These are signs of active gum disease, and the vibrations will be painful and may spread bacteria into the bloodstream.
- Stop immediately if you see any blood.
- Do not use the tool on loose or wobbling teeth.
- Always keep the tool moving to prevent heat damage.
- Use a lubricant or water to keep the tooth surface cool.
- Limit sessions to five minutes to prevent stress.
For gentler everyday options, explore our dog dental care category.
Post-Cleaning Care and Maintenance
After you finish a session, your dog's mouth will have loose debris and bacteria floating around. Wipe their teeth and gums with a clean, damp cloth or a dental wipe. This removes the "sludge" that was vibrated loose. It is also a good time to apply a soothing dental gel if their gums look slightly pink.
Maintaining the results is just as important as the cleaning itself. We carry several brands at BaxterBoo that can help slow down the return of tartar. Using a daily dental chew like Greenies Dental Dog Chews or a specialized diet like Royal Canin Dental can provide mechanical scrubbing between your ultrasonic sessions. These products are designed to work together as a complete system for oral health.
If your vet discovers that your dog has early-stage gingivitis, they may prescribe a specific oral rinse or medication. Our pharmacy offers FDA-approved treatments through our partnership with Pet's Choice. Having these items on hand makes it easier to manage your dog's oral health from the comfort of home while staying under a professional's guidance.
When to Put the Tool Away
There are times when home cleaning is simply not appropriate. If your dog is a senior with fragile teeth, the vibrations might be too much for their system. Similarly, if a dog has a history of heart or kidney issues, you must be extremely cautious. Bacteria from the mouth can travel through the blood to these vital organs. In these cases, the risk of disturbing heavy tartar at home outweighs the benefits.
Behavioral cues are also vital. If your dog is showing signs of extreme stress, such as shaking, tucked tail, or growling, stop the process. Forcing a dog to endure a dental cleaning can ruin your bond and make future vet visits a nightmare. Some dogs will never be candidates for at-home ultrasonic cleaning, and that is perfectly okay.
Bottom line: Home ultrasonic cleaning is a maintenance tool for cooperative dogs with healthy gums, not a cure for established dental disease.
Supporting Oral Health Through Nutrition
What your dog eats directly impacts how fast tartar builds up. Soft, wet foods tend to stick to the teeth more than crunchy kibble. However, not all kibble is created equal. Standard kibble often shatters as soon as a tooth hits it. Specialized dental kibbles are designed with a specific texture that resists shattering. This forces the tooth to sink into the kibble, which scrubs the surface as the dog chews.
You can also look into water additives. These are tasteless liquids you add to your dog's bowl. They contain enzymes that help break down the biofilm that eventually turns into tartar. A dog and cat oral care water additive can be one option to consider as part of your routine.
Using an ultrasonic cleaner once a month while using water additives and dental chews daily creates a multi-layered defense.
Building a Sustainable Routine
Consistency is more effective than intensity. You do not need to spend an hour every Sunday scrubbing your dog's teeth. In fact, that is likely to make your dog hate the process. A better approach is to integrate small dental tasks into your daily life. Maybe they get a dental chew after breakfast and a quick lip-lift inspection after dinner.
Save the ultrasonic cleaner for a once-a-month "deep clean." Use that time to focus on the large molars in the back where tartar likes to hide. Because these teeth are harder to reach with a standard brush, the ultrasonic tool can be very helpful there. Always keep the experience positive with plenty of rewards.
For more routine-building ideas, read these pet dental care tips.
Common Mistakes to Avoid
One of the biggest mistakes owners make is trying to "dig" under the gum line with the metal tip. This can cause a massive amount of pain and can lead to infections. The tip should only ever touch the visible white part of the tooth. If you cannot reach a spot without poking the gums, leave it for the veterinarian.
Another mistake is neglecting the inside of the teeth. We usually focus on the outside because that is what we see when the dog smiles. However, the tongue side of the teeth can also collect significant buildup. If your dog allows it, try to gently use the scaler on those inner surfaces as well.
- Mistake: Using a dry tip. (Solution: Keep the tooth wet with a spray or cloth).
- Mistake: Pressing hard. (Solution: Let the vibrations do the work with a light touch).
- Mistake: Ignoring the back teeth. (Solution: Slowly work your way back as the dog gets comfortable).
- Mistake: Assuming white teeth equal a healthy mouth. (Solution: Continue regular vet checkups).
The Role of the Pharmacy in Dental Health
Sometimes, home care is not enough to manage a dog's oral environment. If your dog suffers from chronic bad breath or recurring infections, your vet might suggest a prescription-strength approach. This might include specialized antibiotics or prescription dental diets like Farmina Vet Life.
Our dog pharmacy provides a convenient way to get these medications and specialized foods delivered to your door. By working with Pet's Choice, we ensure you have access to the same professional products your vet uses. This is especially helpful for owners of breeds prone to dental issues, such as Chihuahuas or Greyhounds, who may need more than just standard over-the-counter solutions.
Summary of Best Practices
Cleaning your dog's teeth with an ultrasonic cleaner is a skill that takes patience and a gentle touch. It is a fantastic way to keep their smile bright and reduce the bacterial load in their mouth. However, it must be used responsibly to avoid damaging the enamel or causing the dog distress.
Always prioritize the comfort of your pet over the cleanliness of the tooth. A dog who trusts you is much easier to care for in the long run. By combining home scaling with high-quality treats, regular brushing, and professional veterinary oversight, you are giving your dog the best chance at a long, healthy life.
Key Takeaway: Success with ultrasonic cleaning comes from slow desensitization and light, sweeping motions that focus on the tooth surface rather than the gum line.
Conclusion
Taking charge of your dog's dental health is a rewarding part of being a pet owner. While the idea of using an ultrasonic cleaner might seem intimidating at first, it is a manageable task when you break it down into small steps. Remember that these tools are meant to supplement a healthy lifestyle that includes good food, dental chews, and regular checkups.
If you find that your dog’s dental needs are more than you can handle alone, we are here to help. From professional-grade dental wipes to specialized diets and pharmacy access for prescription care, we provide the resources you need. Consider setting up an Autoship for your favorite dental treats to ensure you never run out. Keeping your dog's teeth clean is a marathon, not a sprint, and every little bit of care adds up to a happier, healthier pet.
FAQ
Is it safe to use an ultrasonic tooth cleaner on my dog at home?
It is generally safe for healthy dogs if you follow the correct technique and do not have an aggressive or fearful pet. You must use a light touch and keep the tool moving to avoid overheating the tooth or scratching the enamel. However, it is never a replacement for a professional cleaning under anesthesia by a veterinarian.
Does ultrasonic tooth cleaning hurt dogs?
When used correctly on the surface of the tooth, the process should not be painful. Some dogs may find the vibration or the high-frequency sound unsettling, which is why slow introduction is necessary. If your dog has exposed roots, loose teeth, or inflamed gums, the vibrations can be very painful, and you should stop immediately.
How often should I use the ultrasonic cleaner on my dog?
For most dogs, a thorough session once a month is sufficient to manage tartar buildup. You should still brush their teeth daily or every other day with a standard dog toothbrush and pet-safe toothpaste. Overusing the ultrasonic tool can increase the risk of accidental enamel wear.
Can an ultrasonic cleaner remove all the plaque and tartar?
It can remove most visible tartar on the surface of the tooth, but it cannot reach the bacteria living under the gum line. This sub-gingival bacteria is what causes the most serious health issues like bone loss and systemic infections. Only a veterinarian can safely and effectively clean the areas beneath the gums while the dog is sedated.






