
 Save 15% on your 1st Autoship learn more

 Email us
 Live Chat
 FAQs
FAQs





Introduction
You are sitting on the living room floor with your dog after a long walk. You run your hand down their back and feel a hard, tight knot forming behind their ear or under their collar. Your standard comb just slides right over the top of it. At BaxterBoo, we know how frustrating it is when you want your pet to look their best but do not have the right tools to handle a thick or curly coat. A slicker brush is often the missing piece in a home grooming kit. This post explains exactly what this tool is and why it is the go-to choice for professional groomers. We will cover which breeds benefit most and how to use one safely to maintain a healthy, tangle-free coat.
Quick Answer: A slicker brush is a grooming tool featuring a rectangular head populated with fine, short wire pins that are slightly angled. It is designed specifically to penetrate deep into thick or long fur to remove mats, tangles, and loose undercoat hair.
Understanding the Design of a Slicker Brush
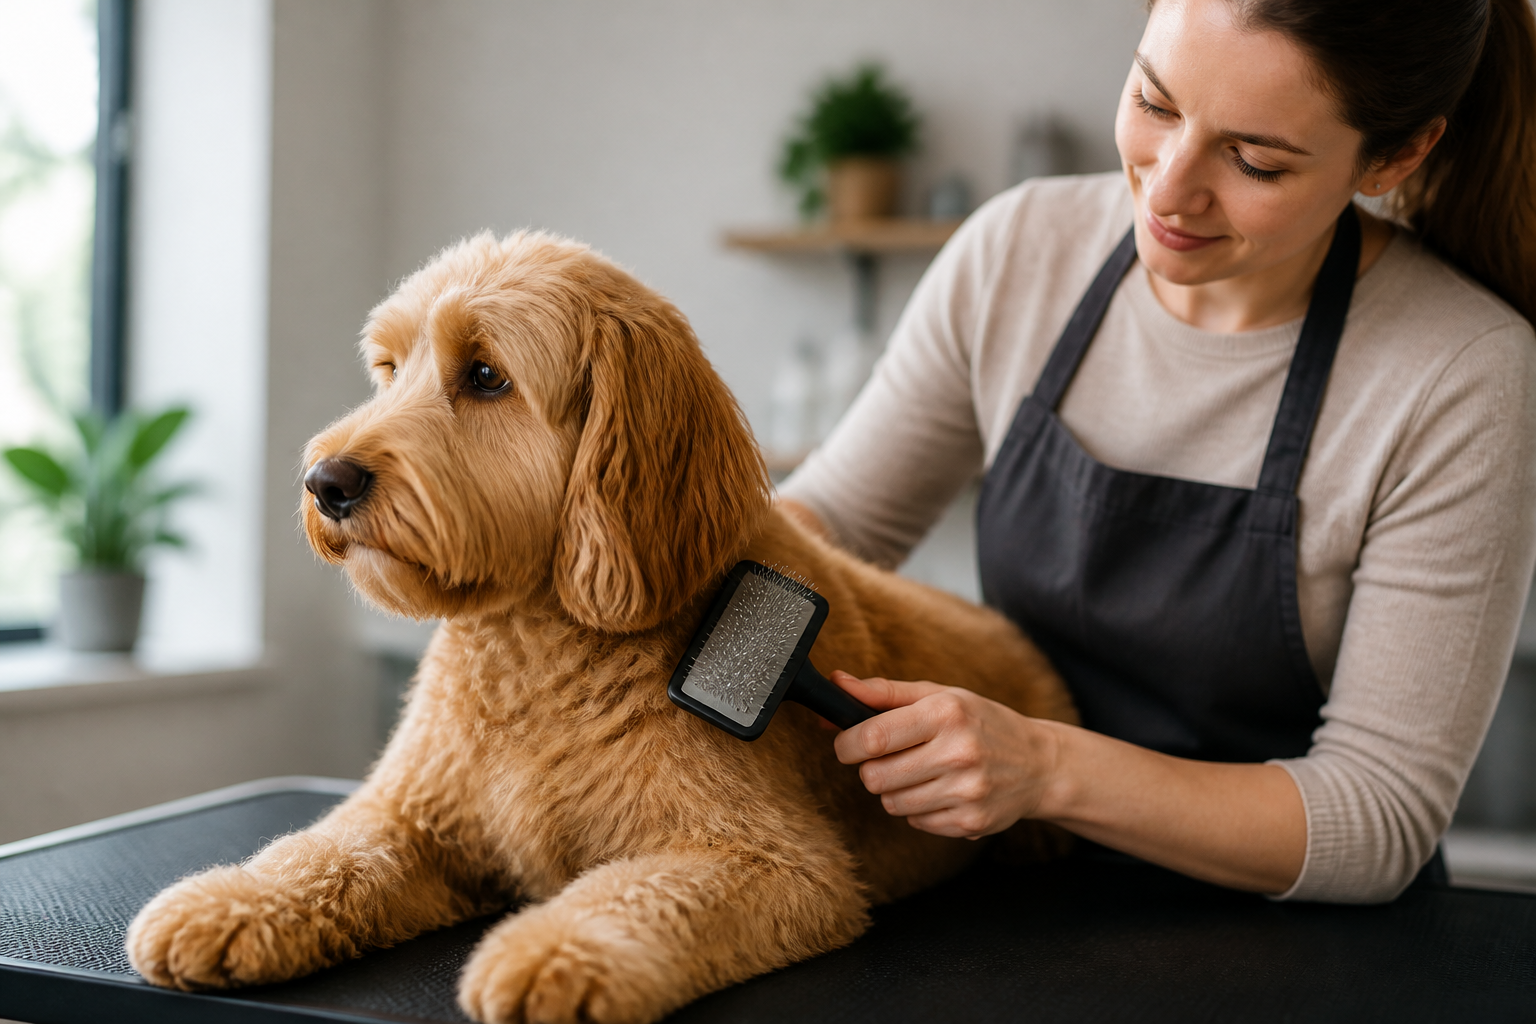
A slicker brush is easy to spot among a sea of grooming supplies. It typically has a flat or slightly curved rectangular head. The most defining feature is the rows of thin wire pins. These pins are not straight like those on a standard pin brush. Instead, they have a tiny hook or a slight bend near the end.
This bend is intentional. It allows the brush to grab onto loose fur and debris without needing to press the pins directly against the skin. The pins are usually mounted on a flexible rubber pad. This pad acts as a shock absorber. When you encounter a knot, the pad gives slightly. This prevents the wires from pulling too sharply on the dog's skin.
There are many variations of this tool. Some have very firm pins for thick, heavy coats. Others have soft, flexible pins for puppies or dogs with sensitive skin. You might also see self-cleaning versions. These have a button that retracts the pins into the head. This leaves the collected fur on the surface for easy removal.
Why the Slicker Brush is Essential
The primary goal of a slicker brush is to manage the undercoat and prevent matting. If you have a dog with a double coat or curly hair, you know that shedding is not just about hair falling on the floor. Much of that loose hair stays trapped against the body. If it is not brushed out, it begins to weave itself into the living fur. This creates mats.
Mats are more than just an eyesore. They can be painful. As they get tighter, they pull on the skin. This can restrict movement or hide skin infections and parasites. A slicker brush reaches through the top layer of fur to grab that loose undercoat before it can cause trouble. You can find tools designed for this work in our dog brushes and combs collection.
Beyond removing mats, these brushes are excellent for removing everyday debris. If your dog loves to run through tall grass or leaves, they likely bring half the backyard inside with them. The fine wire pins are perfect for catching small burrs, dried mud, and dust that a wider-toothed comb might miss.
Key Takeaway: The slicker brush is the most effective tool for reaching the undercoat and stopping mats before they start, making it a staple for long-haired and curly breeds.
Identifying Which Breeds Need This Tool
Not every dog needs a slicker brush. If you have a Pug, a Beagle, or a Lab, this tool is generally too aggressive for their short, sleek coats. On a short-haired dog, the pins can easily scratch the skin because there is no thick layer of fur to act as a buffer.
However, for other breeds, it is a daily necessity. This includes:
- Curly-Coated Breeds: Poodles, Bichon Frises, and various "Doodle" mixes. Their hair grows constantly and traps loose fur easily.
- Long-Haired Breeds: Golden Retrievers, Collies, and Shetland Sheepdogs. These dogs have heavy undercoats that need regular thinning.
- Silky-Coated Breeds: Yorkshire Terriers and Cocker Spaniels. Their fine hair can tangle into "pin mats" very quickly.
- Wire-Haired Breeds: Schnauzers and Airedale Terriers. A slicker brush helps keep their stiff topcoat looking neat.
If your dog has fur that seems to grow in length or has a fuzzy, soft undercoat, a slicker brush should be in your drawer. We carry a wide variety of these brushes at BaxterBoo to suit different sizes and hair types, including the Master Grooming Tools Ergonomic Slicker Dog and Cat Brush.
How to Use a Slicker Brush Safely
Using a slicker brush requires a specific technique. Because the pins are metal and fine, you must use a light touch. A common mistake is pressing too hard, which can lead to a condition called "slicker burn." This is skin irritation caused by the metal pins scraping the surface of the skin.
The Pat and Pull Technique
Instead of long, sweeping strokes like you might use on your own hair, use a "pat and pull" motion.
Step 1: Place the brush. / Lightly touch the brush to a section of the coat.
Step 2: Pull away. / Pull the brush away from the dog's body in a short, gentle stroke.
Step 3: Move in sections. / Work on one small area at a time rather than trying to brush the whole dog at once.
Line Brushing for Thick Coats
For dogs with very dense fur, you should use a method called line brushing. Use one hand to push the fur up, exposing a "line" of skin. Use the slicker brush in your other hand to brush the hair down away from that line. This ensures you are actually reaching the hair closest to the skin where mats usually start.
Vet Tip: Always check your dog’s skin after a grooming session. If you see redness, small scratches, or if your dog flinches when the brush approaches, you may be using too much pressure. If skin irritation persists, consult your veterinarian to rule out underlying allergies or infections.
Maintaining Skin and Coat Health
Regular sessions with a slicker brush do more than just manage hair. The action of the pins against the coat helps distribute natural oils. These oils are produced by the skin and are what give a dog's coat that healthy, glossy shine. Brushing also increases blood circulation to the skin surface.
While you are brushing, use it as an opportunity for a wellness check. Feel for any new lumps, bumps, or sore spots. Look for signs of fleas or ticks. If you notice your dog has chronically dry, flaky skin or is itching constantly, it might be more than a grooming issue. Our dog healthcare collection includes products for skin and coat care alongside other wellness needs.
Our pharmacy provides access to FDA-approved medications and prescription diets through our partnership with Pet's Choice. If your veterinarian recommends a medicated shampoo or an allergy treatment, we can help you manage those needs alongside your regular grooming routine through our pet pharmacy.
Choosing the Right Slicker Brush for Your Dog
When you browse the collection at BaxterBoo, you will see several different types of slicker brushes. Choosing the right one depends on your dog's specific needs.
Pin Firmness
Firm pins are best for very thick, heavy coats like those on a Siberian Husky or a Malamute. The stiffness allows the pins to penetrate the dense fur. Soft pins are better for dogs with fine hair or sensitive skin. If you have a puppy, always start with the softest pins possible to give them a positive introduction to grooming.
Head Shape and Size
A large, rectangular brush is great for the broad areas of the back and sides. However, it can be difficult to use around the legs, armpits, and face. Many owners find it helpful to have a large brush for the body and a smaller, "pointy" or triangular slicker brush for the hard-to-reach areas. For a versatile option, consider the Master Grooming Tools Universal Slicker Brush for Dogs and Cats.
Handle Comfort
Grooming a large, long-haired dog can take thirty minutes or more. Look for a brush with an ergonomic, rubberized handle. This prevents hand fatigue and gives you better control. Better control means you are less likely to accidentally slip and scratch your pet.
Bottom line: Match the pin firmness to your dog's coat density and keep two sizes on hand for full-body grooming.
Avoiding Slicker Burn and Irritation
Slicker burn is a real concern for new groomers. It looks like a red rash or a series of small scratches. It most often happens on areas where the skin is thin, such as the inner thighs, the base of the ears, or the belly.
To avoid this, always test the brush on your own forearm first. If it feels scratchy or painful to you, it will certainly be uncomfortable for your dog. Always keep the brush head flat. If you tilt it and use the edge, you are concentrating all the pressure onto a few pins. This is almost a certain way to cause irritation.
If you do encounter a stubborn mat, do not just keep brushing the same spot. This will irritate the skin. Instead, hold the base of the mat with your fingers so you aren't pulling on the skin. Use the corner of the slicker brush to gently pick at the mat, starting from the ends of the hair and working your way toward the body. For especially difficult tangles, an ergonomic dematting tool can be another grooming option.
Cleaning and Caring for Your Brush
A slicker brush works best when it is clean. As the pins fill with hair, they lose their ability to penetrate the coat. They simply glide over the surface. If you do not have a self-cleaning brush, you can use a metal comb to lift the hair out of the pins.
Over time, the wire pins can become bent or lose their protective tips if they have them. Check your brush regularly. If the pins are severely bent or if the rubber pad is cracking, it is time to replace it. Using a damaged brush can lead to uneven grooming and a higher risk of skin scratches.
Integrating Brushing into Your Routine
The best way to prevent the need for professional "shave-downs" is consistency. For a dog with a high-maintenance coat, five to ten minutes of slicker brushing every other day is much better than an hour-long session once a month. For additional guidance on managing a textured coat, read how to groom a dog with curly hair.
Make the experience rewarding. Use treats and praise. Start with the areas your dog enjoys being touched, like their chest or shoulders. Save the more sensitive areas like the paws or tail for the end of the session. If your dog is particularly anxious about grooming, we offer calming supplements and tools in our Anxiety and Calming section.
By making the slicker brush a regular part of your life, you will notice less hair on your furniture and a much happier, more comfortable dog. Our MVP Rewards program allows you to earn points on every grooming tool and brush you purchase, making it easier to keep your kit updated.
Key Takeaway: Consistency is more important than duration. Short, frequent sessions with a slicker brush prevent painful mats and keep the coat in top condition.
Summary of Slicker Brush Benefits
A slicker brush is not just another plastic tool in a bin. It is a functional piece of equipment designed to solve specific coat problems.
- Mat Prevention: It stops loose hair from weaving into knots.
- Undercoat Management: It thins out the "fuzz" that causes overheating and shedding.
- Skin Health: It stimulates blood flow and spreads natural oils.
- Debris Removal: It catches the dirt and burrs that other brushes miss.
Whether you are preparing for a dog show or just want your pet to be comfortable during their afternoon nap, the slicker brush is the right tool for the job. We have been helping pet owners find the best supplies since 2006, and we stand by the quality of the brands we carry. For more guidance on loose undercoats and routine brushing, see what to know about Australian Shepherd shedding.
FAQ
Can I use a slicker brush on a cat?
Yes, many long-haired cats like Persians or Maine Coons benefit greatly from a slicker brush. However, cat skin is significantly thinner and more delicate than dog skin. You should always use a "soft" version of the brush and an extremely light touch to avoid causing discomfort or injury.
What is the difference between a pin brush and a slicker brush?
A pin brush has straight, widely spaced pins, often with rounded tips. It is used for general brushing and finishing on long, flowing coats. A slicker brush has fine, bent wire pins packed closely together. It is designed for the more difficult tasks of removing mats and pulling out the dense undercoat.
How do I know if I am pressing too hard?
The best way to check your pressure is to brush the back of your own hand. If it leaves red marks or feels uncomfortable, you are using too much force. On your dog, the pins should only be engaging with the hair. You should rarely feel the pins making significant contact with the skin surface.
Should I brush my dog when their fur is wet or dry?
It is generally best to use a slicker brush on a dry coat. Wet hair is more elastic and prone to breakage. Furthermore, if your dog has existing mats, water can actually cause those mats to shrink and tighten as they dry, making them much harder to remove. Always brush out your dog before giving them a bath.






