
 Save 15% on your 1st Autoship learn more

 Email us
 Live Chat
 FAQs
FAQs





Introduction
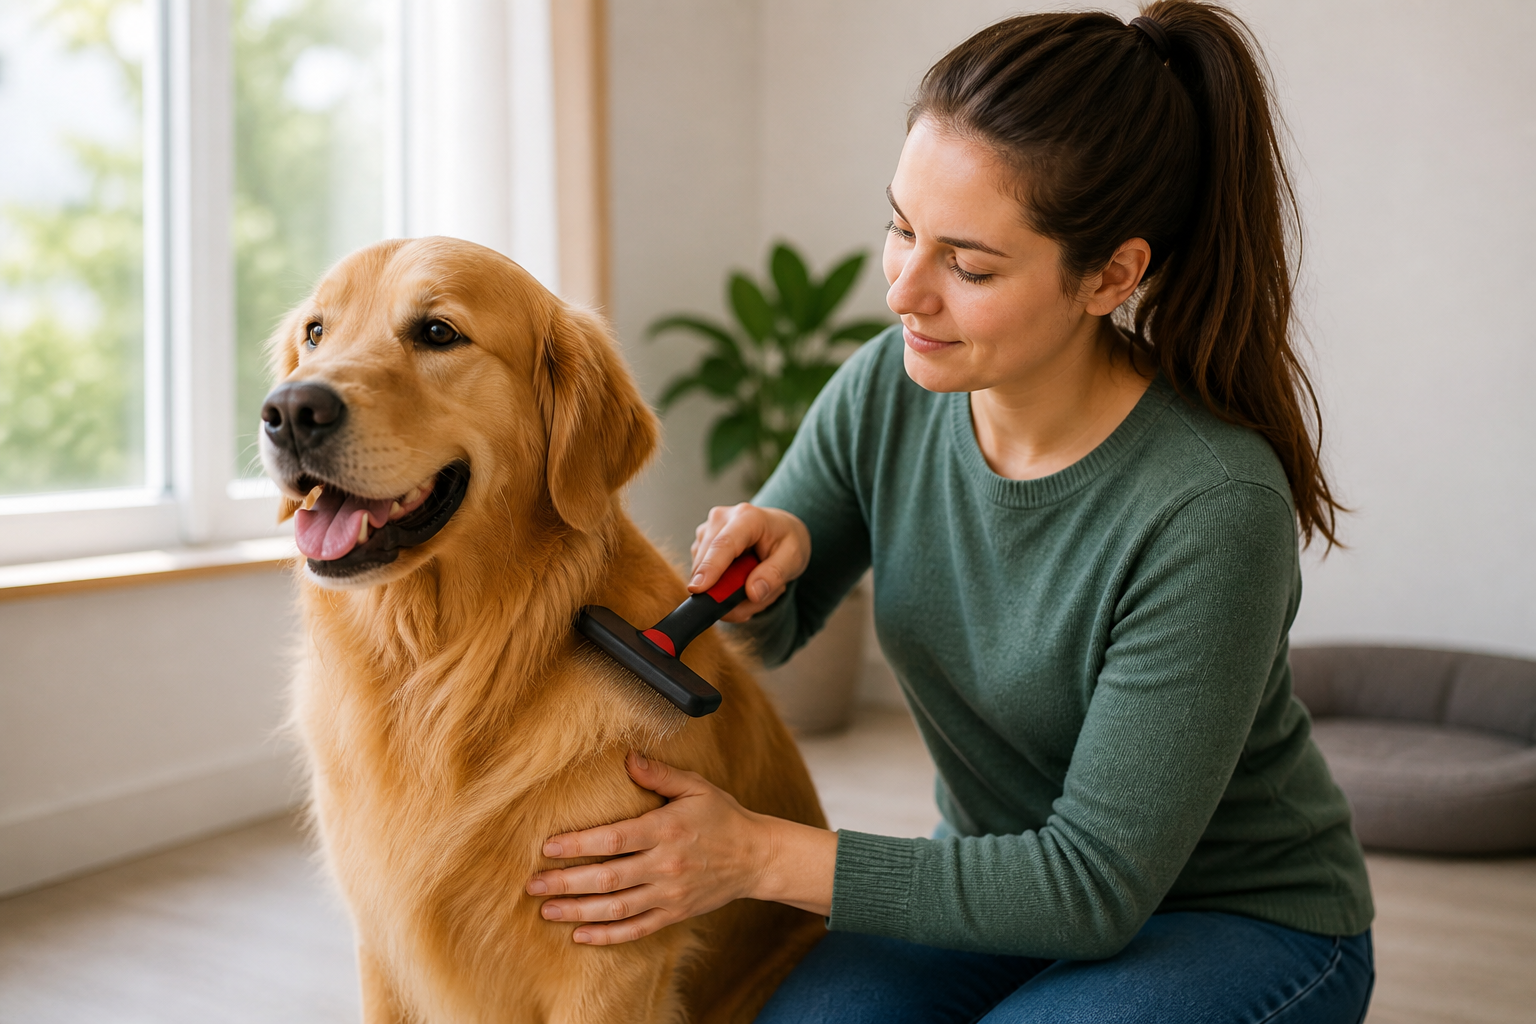
You are standing in the grooming aisle or browsing through a collection of tools online. You see a slicker brush with its hundreds of tiny, bent wire pins and your first thought is probably one of concern. It looks more like a tool from a workshop than a beauty product for your best friend. At BaxterBoo, we hear this question from pet parents every day. It is natural to worry that these metal bristles might scrape or poke your dog's sensitive skin. When used correctly, a slicker brush is one of the most effective tools for removing mats and loose undercoat. However, improper technique can lead to discomfort or even skin irritation. This article explores how to use these brushes safely to ensure your grooming sessions are a time for bonding rather than stress.
Quick Answer: Slicker brushes do not hurt dogs when used with the correct technique and pressure. They are designed to grab loose hair and tangles without reaching the skin, but excessive pressure or repetitive strokes in one spot can cause irritation known as brush burn.
What Is a Slicker Brush?
A slicker brush is characterized by a flat or slightly curved head filled with rows of thin wire pins. These pins are usually angled or "hooked" at the ends. This specific design allows the brush to hook onto dead hair and pull it away from the healthy coat. It also helps to tease apart small knots before they turn into tight, painful mats.
These brushes come in many variations. Some have very firm pins for thick, heavy coats. Others have soft, flexible pins for dogs with finer hair or more sensitive skin. The handles are typically ergonomic because grooming a large, fluffy dog can take some time.
You might see them in different sizes as well. A large slicker is great for the broad back of a Golden Retriever. A tiny, "extra-small" version is perfect for reaching into the armpits or behind the ears of a Shih Tzu. While they look intimidating, they are the primary tool used by professional groomers worldwide. For at-home grooming, you can compare options in our dog brushes and combs collection.
Can These Brushes Actually Hurt Your Dog?
The short answer is that the tool itself is safe, but the person holding it determines the comfort level. A slicker brush can hurt if you apply too much downward pressure. Unlike a human hairbrush, you do not want to press these wire pins firmly against the skin.
The pins are designed to work through the hair. If you are brushing a dog with a very thin coat, such as a Greyhound or a Boxer, a slicker brush might be too harsh. The pins could easily scratch the skin because there is not enough hair to act as a buffer. For these breeds, a rubber curry brush or a soft bristle brush is a better choice.
Another way a slicker brush might cause pain is if it catches on a mat. If you pull hard on a tangle, the brush will tug on the skin. This is why technique is so important. You should never "rip" the brush through the coat. Instead, use short, gentle strokes to work through the layers of hair.
Key Takeaway: The goal of a slicker brush is to groom the hair, not the skin. Always use the hair as a cushion between the wire pins and your dog’s body.
Understanding Brush Burn
One of the most common injuries from improper grooming is called brush burn. This is a form of skin irritation caused by repetitive scraping. It often happens when a pet owner is focused on a single stubborn mat. They brush the same spot over and over again until the skin becomes red, raw, and painful.
Brush burn can be hard to see at first, especially on a fluffy dog. You might only notice it later when your dog starts licking the area excessively. In some cases, the skin may even scab over. This is why we always recommend checking the skin frequently during your grooming session.
If you notice your dog's skin turning pink or red, stop brushing that area immediately. Give the skin a rest for a few days. If the irritation looks severe or seems to be getting worse, it is time to call your veterinarian. Our pet pharmacy carries various skin-soothing treatments and medications, but a professional diagnosis is the best first step for any skin injury.
The Arm Test for Safety
If you are worried about how much pressure to use, there is a simple way to test it. Take the slicker brush and run it across the inside of your own forearm. This area of human skin is quite sensitive, similar to a dog's belly or inner thighs.
Start with very light pressure. You will feel the pins grabbing the surface, but it should not feel like a scratch. Now, try pressing down harder. You will quickly feel when the metal pins become uncomfortable. This sensation is exactly what your dog feels.
When you groom your dog, aim for the pressure that felt comfortable on your arm. Remember that your dog's skin is actually thinner than human skin in many places. Always err on the side of caution. It is better to take longer with light strokes than to finish quickly with heavy, painful ones.
Choosing the Right Slicker Brush
Not all slicker brushes are created equal. Choosing the wrong one for your dog's specific coat type is a common mistake that leads to discomfort. We recommend looking at three factors: pin flexibility, pin length, and brush size.
Pin Flexibility
Firm slicker brushes have stiff wires that do not bend easily. These are designed for "power grooming" on thick, double coats like those found on Malamutes or Newfoundlands. If you use a firm brush on a dog with a single, silky coat, you are much more likely to cause irritation. Soft slicker brushes have pins that give way when they meet resistance. These are much safer for beginners and for dogs with sensitive skin.
For a gentle option, consider the U-Groom Slicker Brush for Dogs and Cats, which has stainless-steel or rubber pins and an ergonomic handle.
Pin Length
If you have a Poodle or a "Doodle" with a long, curly coat, you need a long-pin slicker brush. These pins can reach deep down into the curls to find hidden tangles. For short-coated breeds, long pins are unnecessary and increase the risk of poking the skin.
Tip Coatings
Some slicker brushes feature tiny plastic or rubber drops on the ends of the wire pins. These are often marketed as "comfort tips." While they can be gentler on the skin, they can sometimes make it harder to get through thick mats. If your dog is very sensitive, a tipped brush is a great starting point.
Brushing by Coat Type
Every dog has unique grooming needs. Using a slicker brush on a Terrier is a different experience than using it on a Pomeranian. Understanding your dog's coat will help you avoid causing pain.
Curly and Wool Coats
Breeds like Poodles and Bichon Frises have hair that grows continuously. It does not fall out on its own. Instead, it gets trapped in the surrounding curls. A slicker brush is essential here to "fluff" the coat and remove that trapped hair. Use a soft slicker and follow up with a metal comb to ensure you reached all the way to the base of the hair. For additional guidance, read our article on how to groom a dog with curly hair.
Double Coats
Golden Retrievers, Huskies, and Shepherds have a soft undercoat and a tougher outer coat. The slicker brush is perfect for pulling out the dead undercoat during shedding season. Focus on the areas where the hair is thickest, like the haunches and the neck.
Wire Coats
Terriers with wiry coats need slicker brushes to remove debris and loose hair. Their skin is often a bit tougher, but you still need to be careful around the legs and face where the hair is thinner.
Silky Coats
Yorkshire Terriers and Maltese dogs have fine, hair-like coats. These dogs are the most prone to brush burn. Use a very soft slicker brush and never press down. You are essentially "skimming" the surface to remove tangles.
Vet Tip: If your dog has a history of skin allergies or chronic irritation, consult your vet before starting a heavy grooming routine. They may recommend specific medicated wipes or shampoos to use alongside your brushing to keep the skin barrier healthy.
The Importance of Lubrication
One of the biggest mistakes pet owners make is "dry brushing." Brushing a dry coat increases static electricity and friction. This makes it more likely that the brush will pull on the hair and cause pain. It can also lead to hair breakage, which actually makes mats form faster in the future.
Before you start with the slicker brush, lightly mist your dog's coat with a detangling spray or a leave-in conditioner. You do not want the hair to be soaking wet, just slightly damp. This lubrication helps the wire pins glide through the hair.
If you encounter a knot, apply a little extra spray directly to that spot. Let it sit for a minute to soak in. This will soften the hair fibers and make the knot much easier to tease apart. This simple step can turn a painful grooming session into a relaxing spa day for your pup. You can also review these dog bathing and brushing tips for guidance on working with wet or freshly bathed coats.
Step-by-Step Safe Brushing Technique
To ensure you never hurt your dog, follow this methodical approach. It focuses on safety and thoroughness.
Step 1: Prepare the coat. / Spray a light mist of detangling solution over the areas you plan to brush. This reduces friction and prevents hair breakage.
Step 2: Start at the bottom. / Begin at the dog's rear or at the bottom of a leg. Work in small sections rather than trying to brush the whole dog at once.
Step 3: Use the "Line Brushing" method. / Use one hand to push the hair up and out of the way. Use the slicker brush in your other hand to brush the hair downward, one small layer at a time. This allows you to see the skin and ensures you are reaching the base of the coat.
Step 4: Use short, flicking motions. / Instead of long, sweeping strokes, use short motions. Flick the brush away from the dog's body at the end of each stroke. This prevents the pins from staying in contact with the skin for too long.
Step 5: Check your work. / After brushing a section, run a metal comb through it. If the comb catches, there is still a tangle that needs attention from the slicker brush.
Step 6: Reward and praise. / Give your dog a small treat every few minutes. This builds a positive association with the brush.
Avoiding Sensitive Areas
There are certain parts of a dog's body where you should be extremely careful with a slicker brush, or avoid it altogether. The skin on the face, ears, and belly is much thinner and more sensitive than the skin on the back.
Never use a slicker brush directly on your dog's face. The risk of poking an eye or scratching the nose is too high. Instead, use a small metal comb or a soft toothbrush for facial hair. The same applies to the ears. The skin on the ear flaps is very delicate and can bleed easily if scratched by wire pins.
The "armpit" and "groin" areas are also high-risk zones. These areas are prone to matting because of the friction from movement, but the skin there is very loose and thin. When brushing these spots, use your hand to pull the skin taut so the brush does not catch in a fold of skin.
Key Takeaway: Always switch to a gentler tool like a comb or a soft bristle brush when working around the face, ears, and sensitive sanitary areas.
Managing Mats Without Pain
If you find a large mat, your first instinct might be to brush it out with force. This will definitely hurt your dog. Mats are clumps of hair that have become interwoven, often including dirt or skin oils. They pull tightly on the skin, which makes the area tender.
To handle a mat safely, hold the base of the mat with your thumb and forefinger. This "pins" the hair so that when you brush the mat, you are pulling against your own fingers instead of the dog's skin. Start at the very tip of the mat and work your way inward.
If a mat is too tight to brush out, do not keep trying. This is how brush burn happens. Instead, you may need to use a specialized de-matting tool or, in some cases, carefully clip the mat out with electric shears. If your dog is severely matted, it is often more humane to have a professional groomer "shave down" the coat and start fresh.
- Never pull upward on a mat.
- Always hold the hair at the base.
- Use extra detangling spray.
- Take frequent breaks.
Signs Your Dog Is in Pain
Dogs are often stoic, but they will show subtle signs if the slicker brush is causing discomfort. Being a "practically expert" pet owner means learning to read these cues before your dog feels the need to growl or snap.
Watch for skin twitching. If the skin on your dog's back or side flinches when the brush touches it, you may be using too much pressure. Another sign is "whale eye," where the dog turns its head away but keeps its eyes on you, showing the whites of the eyes. This indicates anxiety and discomfort.
Some dogs will try to move away or "lean" away from the brush. Others might lick their lips or yawn excessively. These are all signals that they are not enjoying the process. If you see these signs, stop, check the skin for redness, and try using a lighter touch or a softer brush.
Grooming and Health
Regular grooming is about more than just looking good. It is a vital part of your dog's overall health. When you use a slicker brush, you are also checking for lumps, bumps, or parasites like fleas and ticks.
Sometimes, what looks like a grooming problem is actually a medical one. If your dog has very dry, brittle hair that mats easily, they might have a nutritional deficiency or an underlying health issue. If you notice unusual skin odor, discharge, or extreme dandruff, it is best to consult your veterinarian.
Our pharmacy at BaxterBoo offers a wide range of medications and prescription diets for dogs with chronic skin conditions. A healthy coat starts from the inside out. If your dog's skin is healthy, they will be much more comfortable during their weekly brushing sessions.
Conclusion
A slicker brush is a powerful tool that can keep your dog’s coat looking spectacular and free of painful mats. While the wire pins look sharp, they are designed to work with the hair, not against the skin. By using light pressure, the "line brushing" technique, and plenty of detangling spray, you can ensure that your dog stays comfortable and safe. Remember to always test the brush on your own arm first and avoid sensitive areas like the face and ears.
- Always use a "skimming" motion rather than pressing down.
- Mist the coat with water or spray before you start.
- Check the skin frequently for any signs of redness or irritation.
- Use high-value treats to make the experience positive.
If you find that your dog’s skin needs a little extra care after a grooming session, or if you are looking for the best professional-grade tools, we have you covered. Explore our dog grooming category for a wide selection of brushes and sprays. For pets with more sensitive needs, our pharmacy offers expert-backed solutions to keep their skin and coat in peak condition. Sign up for the MVP Rewards programme to earn points on every grooming essential you buy, ensuring your pup stays pampered and happy.
FAQ
Can I use a slicker brush on a short-haired dog?
While you can use a slicker brush on some short-haired breeds like Labradors to remove undercoat, it is generally not recommended for very thin-coated dogs. Breeds with little hair between the brush and the skin, like Boxers or Greyhounds, are at a higher risk for scratches and irritation. For these dogs, a rubber grooming mitt or a soft bristle brush is a much safer and more effective choice.
How often should I use a slicker brush on my dog?
For most long-haired or double-coated dogs, using a slicker brush two to three times a week is ideal. This frequency prevents mats from forming and keeps shedding under control. If your dog has a very curly coat that mats easily, you might need to do a quick "once-over" every day. Always check the skin for any redness before you start a new session to ensure the skin has recovered from the previous one.
What should I do if I accidentally cause brush burn?
If you notice a red or raw spot on your dog's skin, stop brushing immediately and clean the area gently with lukewarm water. Avoid using any scented lotions or human products, as these can sting. You can use a pet-safe antiseptic spray or a soothing hydrocortisone cream if recommended by your vet. If the area starts to ooze, develops a foul smell, or your dog seems to be in significant pain, contact your veterinarian for professional treatment.
Is a slicker brush better than a pin brush?
These two brushes serve different purposes. A pin brush has longer, wider-spaced teeth and is best for general brushing and finishing on long, silky coats. A slicker brush is much better at removing the fine, fuzzy undercoat and breaking up small tangles. Most owners of long-haired dogs find that they need both: the slicker brush for the heavy-duty de-shedding and a pin brush or comb for the final styling and sensitive areas.






