
 Save 15% on your 1st Autoship learn more

 Email us
 Live Chat
 FAQs
FAQs





Introduction
You just finished a long grooming session and your dog looks fantastic. You look down at your slicker brush and see a thick mat of gray fuzz, skin flakes, and oils trapped between those tiny wire pins. It is tempting to just toss the brush back in the drawer, but those trapped materials can harbor bacteria that irritate your dog's skin. At BaxterBoo, we know that the tools you use are just as important as the technique you apply. Keeping your grooming gear clean ensures that every stroke is effective and hygienic. This guide covers how to remove hair daily, how to deep clean without causing rust, and how to know when it is time for a new brush. Proper maintenance helps your grooming tools last longer and keeps your pet’s coat healthy.
Quick Answer: To clean a slicker brush, remove the hair after every use using a comb or your fingers. For a deep clean, wipe the pins with a cloth dampened with soapy water, then air dry with the pins facing down to prevent rust and cushion damage.
Why Keeping Your Slicker Brush Clean Matters
A slicker brush is designed to reach deep into the undercoat to pull out loose fur and break up tangles. Because the pins are so fine and closely spaced, they act like a magnet for everything hiding in your dog’s coat. This includes dead skin cells, natural oils, dirt from the backyard, and even microscopic pests or bacteria. If you do not clean the brush, you are essentially raking that old dirt and bacteria back across your dog’s skin the next time you groom them.
Dirty brushes do not perform as well as clean ones. When the base of the pins is packed with old hair, the pins cannot flex or penetrate the coat properly. This makes the grooming process take longer and can cause the brush to pull uncomfortably on your dog’s skin. A clean brush glides through the fur. It distributes natural oils evenly, which gives the coat a healthy shine. It also allows you to see the condition of the pins so you can spot rust or damage before it scratches your pet.
Maintaining your tools is also a matter of value. High quality brushes from brands like Kong or RC Pets are built to last, but they require basic care to stay in top shape. Neglected brushes often develop rust or mold in the rubber cushion. Once these issues take hold, the brush is no longer safe for use. A few minutes of cleaning can save you from having to replace your favorite tools prematurely. Explore our dog grooming supplies when it is time to replace or expand your grooming kit.
Key Takeaway: Regular cleaning prevents the spread of bacteria and ensures your brush remains effective at removing mats and spreading natural oils.
Daily Maintenance and Hair Removal
The first step in caring for your slicker brush happens the moment you finish using it. You should never store a brush that is still full of hair. Over time, the natural oils on that hair can become rancid or sticky, making it much harder to clean the pins later. Most hair can be pulled away with your fingers, but some slicker brushes have very sharp or fine pins that make this difficult.
If you find it hard to pull the hair out by hand, use a fine-toothed metal comb. Slide the comb through the pins starting at the base of the brush and lift upward. This should pop the mat of hair right off the pins. You can also use our dog brushes and combs, which include tools designed to help remove loose fur and debris.
Step 1: Finish your grooming session and tap the back of the brush against a hard surface to loosen any surface dirt.
Step 2: Use your fingers or a metal comb to lift the hair mat away from the pins.
Step 3: Check for any remaining stubborn clumps or tangles caught in the wire.
Step 4: Give the brush a quick blow or a wipe with a dry cloth to remove loose dander.
Consistency is the most important part of this process. If you remove the hair every single time, you will rarely need to perform an aggressive deep clean. This protects the delicate wire pins from being bent or stressed by thick mats of old fur.
The Deep Cleaning Process
Every few weeks, your slicker brush will need a more thorough cleaning to remove built up oils and skin cells. Unlike some other types of brushes, you should almost never soak a slicker brush in a bucket of water. Most slicker brushes have a rubber or foam cushion that holds the pins. If water gets trapped behind that cushion, it can take days to dry. This creates a perfect environment for mold and mildew to grow right where you can’t see it.
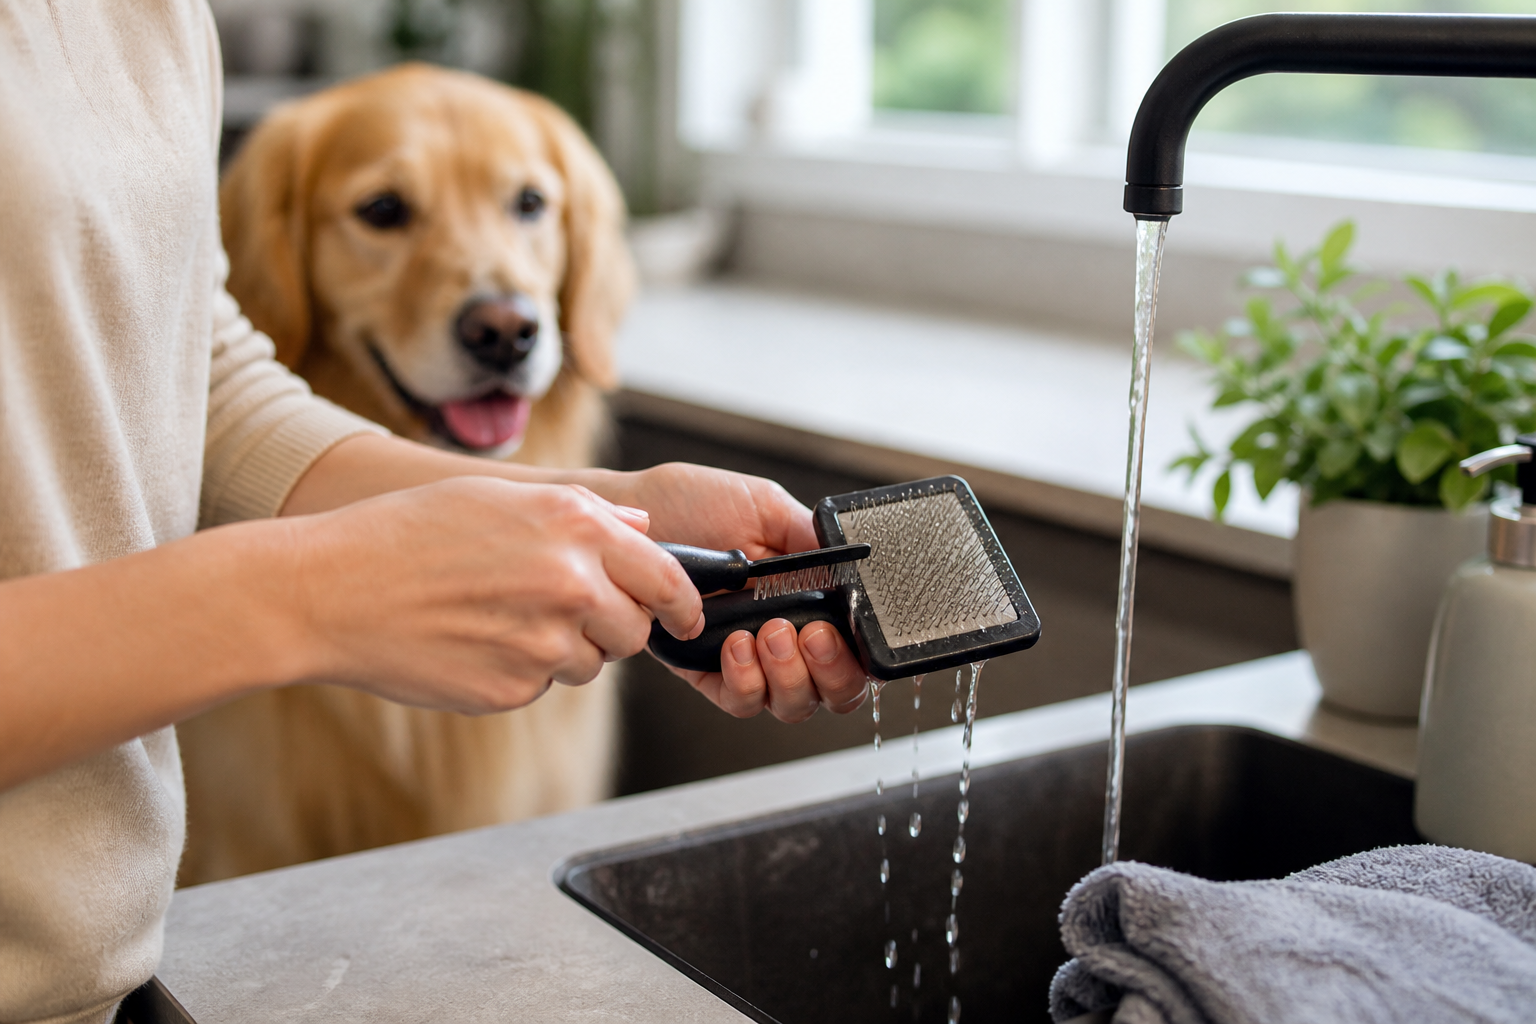
Instead of soaking, use a damp cloth method. Mix a small amount of mild pet shampoo or dish soap with warm water. Dip a clean cloth or a soft-bristled toothbrush into the soapy water. Gently scrub the pins and the surface of the cushion. The toothbrush is particularly helpful for getting in between the rows of wires without putting too much pressure on them.
After scrubbing, wipe the brush again with a cloth dampened only with plain water. This removes any soap residue that could irritate your dog's skin. Be careful not to let water run down into the holes where the pins meet the cushion. If your brush is particularly dirty, you can use a disinfectant spray designed for grooming tools, but ensure it is pet safe and dried completely before use.
Vet Tip: If your dog has a history of skin infections or hot spots, clean your grooming tools with a pet safe disinfectant after every use. This helps prevent the reintroduction of bacteria to sensitive skin areas.
Drying Your Slicker Brush Correctly
Drying is the most overlooked part of the cleaning process, but it is the most critical for preventing rust. Most slicker brush pins are made of stainless steel or coated wire. While they are water resistant, they are not waterproof. If moisture sits at the base of the pins for an extended period, they will begin to corrode. Rust makes the pins brittle and creates a rough surface that can snag and break your dog's hair.
Always dry your brush with the pins facing down. You can lay it on a clean, dry towel with the handle propped up slightly. This allows any moisture that might have snuck into the cushion to gravity drain out of the pin holes. Never use a hair dryer or place the brush on a radiator to speed up the process. Excessive heat can warp the plastic handle or cause the rubber cushion to become brittle and crack.
Wait until the brush is completely dry before storing it in a drawer or bag. If you store a damp brush in a confined space, it will likely develop a musty smell. This is a sign that bacteria or mold are beginning to grow. At BaxterBoo, we recommend having a dedicated spot in a well-ventilated area for your grooming tools to dry after their monthly deep clean. For additional bathing and coat-care guidance, read our tips for bathing your dog.
Caring for Self Cleaning Slicker Brushes
Self cleaning slicker brushes have become very popular because they simplify the hair removal process. These brushes feature a button that retracts the pins into the brush head, leaving the hair on a flat surface where it can be easily wiped away. While these are huge time savers, they still require maintenance.
The internal mechanism of a self cleaning brush can be sensitive to debris. If hair or dander gets inside the housing, the button may start to stick or the pins may not extend fully. Periodically, you should retract the pins and wipe the flat face of the brush with a damp cloth. Check the openings to ensure no fur has been pushed inside the handle. The Master Grooming Tools self-cleaning slicker brush is one available option for owners who prefer this design.
Since these brushes have more moving parts, you must be even more careful with water. Never submerge a self cleaning brush. Water inside the handle can ruin the spring mechanism and lead to internal rust. A quick wipe down is usually all these models need to stay in great shape. Our team at BaxterBoo often suggests these for owners of high-shedding breeds because they encourage more frequent hair removal.
Inspecting for Wear and Tear
While cleaning your brush, take a moment to inspect the condition of the pins and the cushion. Slicker brushes are precision tools, and even a single bent pin can cause issues. A pin that is out of alignment can scratch your dog's skin or create a sharp point that pulls on the fur. Run your hand very lightly over the top of the pins to feel for any that are protruding or sharp.
Check the rubber cushion for signs of "sinking." If the cushion feels soft or if the pins are disappearing into the brush, the structural integrity is gone. This often happens after years of use or if the brush has been exposed to high heat. A failing cushion means the brush can no longer provide the necessary tension to remove mats effectively.
If you see any orange or brown discoloration at the base of the pins, that is rust. Rust cannot be safely cleaned off a slicker brush because the pins are too small and numerous. Using a rusted brush on your dog is a safety risk. It can lead to skin irritation or even infections if a rusted pin scratches the skin. If you find rust, it is time to retire that brush and look for a replacement.
Bottom line: A damaged brush is a safety hazard for your pet; inspect your tools during every cleaning to ensure the pins are straight and rust free.
Skin Health and Grooming Hygiene
The cleanliness of your grooming tools directly impacts your dog's skin health. We often see pet owners struggling with mysterious skin flakes or redness that persist even after switching foods. In some cases, the culprit is a dirty brush that is constantly redistributing dander and oils. For dogs with allergies or sensitive skin, this can trigger a cycle of itching and inflammation.
If your dog's skin seems irritated, take a close look at your grooming routine. Are you using a clean brush? Are you brushing too hard? A clean slicker brush should require very little pressure to work. If you find yourself pushing hard to get through the coat, the brush may be clogged or the pins may be dull.
When skin issues become a chronic problem, it is important to look beyond just the tools. Our pet pharmacy offers prescription products when recommended by a veterinarian. If your veterinarian identifies an underlying allergy or skin condition, they may prescribe a medicated shampoo or a specific diet to support the skin barrier. Using these treatments in combination with a clean, high quality slicker brush is the best way to get your dog's coat back to its best.
Proper Storage for Longevity
Where you keep your brush between grooming sessions matters just as much as how you clean it. Many people keep their grooming kit in the bathroom, but the high humidity from showers can lead to rust and mold growth on brushes. It is better to store your tools in a cool, dry place like a hallway closet or a dedicated grooming bag in the laundry room.
Avoid throwing your slicker brush into a crowded drawer where other heavy tools might sit on top of it. The weight of clippers or heavy combs can permanently bend the wire pins. If your brush came with a protective cover for the pins, use it. If not, try to store the brush with the pins facing up or hanging from a hook.
If you travel with your dog, keep the slicker brush in a hard-sided container. This prevents the pins from being crushed in your luggage. A little bit of care in how you store the brush will ensure that when you pull it out for a quick touch-up, it is clean, straight, and ready to work.
Key Takeaway: Store your brushes in a dry, low-humidity area and protect the pins from being crushed to extend the life of your grooming tools.
Transitioning to a New Grooming Routine
If you have not been cleaning your slicker brush regularly, starting now can make a world of difference. You might notice that your dog becomes more relaxed during grooming because the brush is no longer pulling or scratching. You may also see a reduction in that "doggy smell" as you stop redistributing old oils and bacteria.
Step 1: Perform a thorough inspection of your current brush and replace it if you see rust or bent pins.
Step 2: Clear out all old hair using a comb.
Step 3: Perform a deep clean using the damp cloth and toothbrush method.
Step 4: Establish a new habit of removing hair immediately after every use.
Grooming is a great way to bond with your pet. When your tools are clean and working properly, it becomes a soothing massage for your dog rather than a chore they try to avoid. It also gives you a chance to check for lumps, bumps, or pests like fleas and ticks. For more coat-care ideas, read how to groom a dog with curly hair.
When to Call the Professional
While home grooming is essential, there are times when your slicker brush might not be enough. If your dog has severe matting that reaches all the way to the skin, a slicker brush can be painful and ineffective. In these cases, it is safer to visit a professional groomer who can safely remove the mats without hurting your pet.
Similarly, if you notice your dog's skin is extremely red, has a foul odor, or has open sores, stop brushing immediately. These are signs of a skin infection that needs medical attention. A brush can irritate these areas further and spread the infection. This is the right time to contact your veterinarian for a diagnosis and treatment plan.
By keeping your tools clean and monitoring your pet's skin, you stay ahead of potential health problems. At BaxterBoo, we are committed to providing you with the knowledge and the products you need for a lifetime of happy grooming. Whether you have earned rewards through our MVP Rewards programme or are saving time with our Autoship programme, we are here to support your journey as a pet owner.
Conclusion
Cleaning your dog's slicker brush is a simple task that has a major impact on their comfort and health. By removing hair daily and performing a monthly deep clean with a damp cloth, you prevent the buildup of bacteria and protect the delicate wire pins from rust. Remember to always dry your brush pins-down and store it in a dry place to ensure it lasts for years. A well-maintained brush makes grooming more efficient and keeps your pet's coat looking its best. If you notice any signs of skin irritation during your grooming sessions, consult your vet and check out our pharmacy for any prescribed skin care needs. To keep your grooming kit fully stocked with the best brands, visit our dog grooming category and start earning points with our MVP Rewards programme today.
FAQ
Can I soak my dog's slicker brush in soapy water?
No, you should avoid soaking a slicker brush because water can get trapped in the rubber cushion. This trapped moisture often leads to mold growth and can cause the metal pins to rust from the inside out. It is much safer to wipe the pins and cushion with a damp, soapy cloth and dry it immediately.
How often should I clean the hair out of my slicker brush?
You should remove the hair from your slicker brush after every single grooming session. Leaving hair in the brush allows skin oils and dander to build up, which can make the brush unsanitary and less effective over time. A quick pass with your fingers or a metal comb takes only a few seconds and keeps the tool ready for next time.
My slicker brush has a few bent pins; is it still safe to use?
It depends on how badly they are bent, but generally, you should replace a brush with bent pins. A pin that sticks out at an odd angle can easily scratch your dog's skin or snag on their fur, making the grooming experience painful. Regularly inspecting your brush for damage is a key part of pet safety.
What is the best way to dry a slicker brush after cleaning it?
The best way to dry a slicker brush is to lay it on a clean towel with the pins facing downward. This allows any water that might have reached the cushion to drain away from the handle and the pin holes. Avoid using high heat from a hair dryer, as this can damage the plastic and rubber components of the brush.






