Save 15% on your 1st Autoship learn more

 Email us
 Live Chat
 FAQs
FAQs





Introduction
You just left the vet with a bag of prescription kibble and a strict warning. No table scraps. No extra biscuits. No store-bought jerky. Your dog looks at you with those expectant, "where is my snack?" eyes. You realize the daily training routine just got much harder. We understand that keeping your dog healthy often means sticking to a very specific diet. At BaxterBoo, we see many owners navigating these food restrictions while still wanting to reward their companions. Learning how to make dog treats from dry dog food allows you to provide variety without breaking the rules. This guide explains how to turn standard kibble into crunchy or soft rewards right in your own kitchen. It is a practical way to keep your dog happy while maintaining their health goals.
Why Turn Kibble Into Treats?
The most common reason people search for this technique is a medical necessity. If your dog has a chronic condition like kidney disease, pancreatitis, or severe food allergies, their diet is their medicine. Even one "normal" dog biscuit can cause a flare-up of symptoms. Using their existing dry food ensures that the protein, fat, and mineral levels stay exactly where the veterinarian intended.
There is also the matter of picky eaters. Some dogs find the novelty of a different shape or texture exciting. A piece of kibble might be boring when served in a bowl. However, that same food becomes a high-value reward when it is ground up, shaped into a star, and baked until extra crispy. It smells different when it is heated. The texture changes from a hard pellet to a crumbly biscuit.
Finally, this method is budget-friendly. Premium dog food is an investment. If you are already buying high-quality brands like our Orijen selection, our Acana selection, or our Farmina selection, you are paying for excellent ingredients. Turning that kibble into treats means you do not have to buy separate bags of expensive snacks. You are essentially "repackaging" the nutrition you have already paid for.
Quick Answer: The easiest way to make treats from dry dog food is to grind two cups of kibble into a fine powder using a blender. Mix in one cup of water to form a dough, shape into small rounds, and bake at 350 degrees Fahrenheit for 30 minutes.
The Basic Kibble Flour Recipe
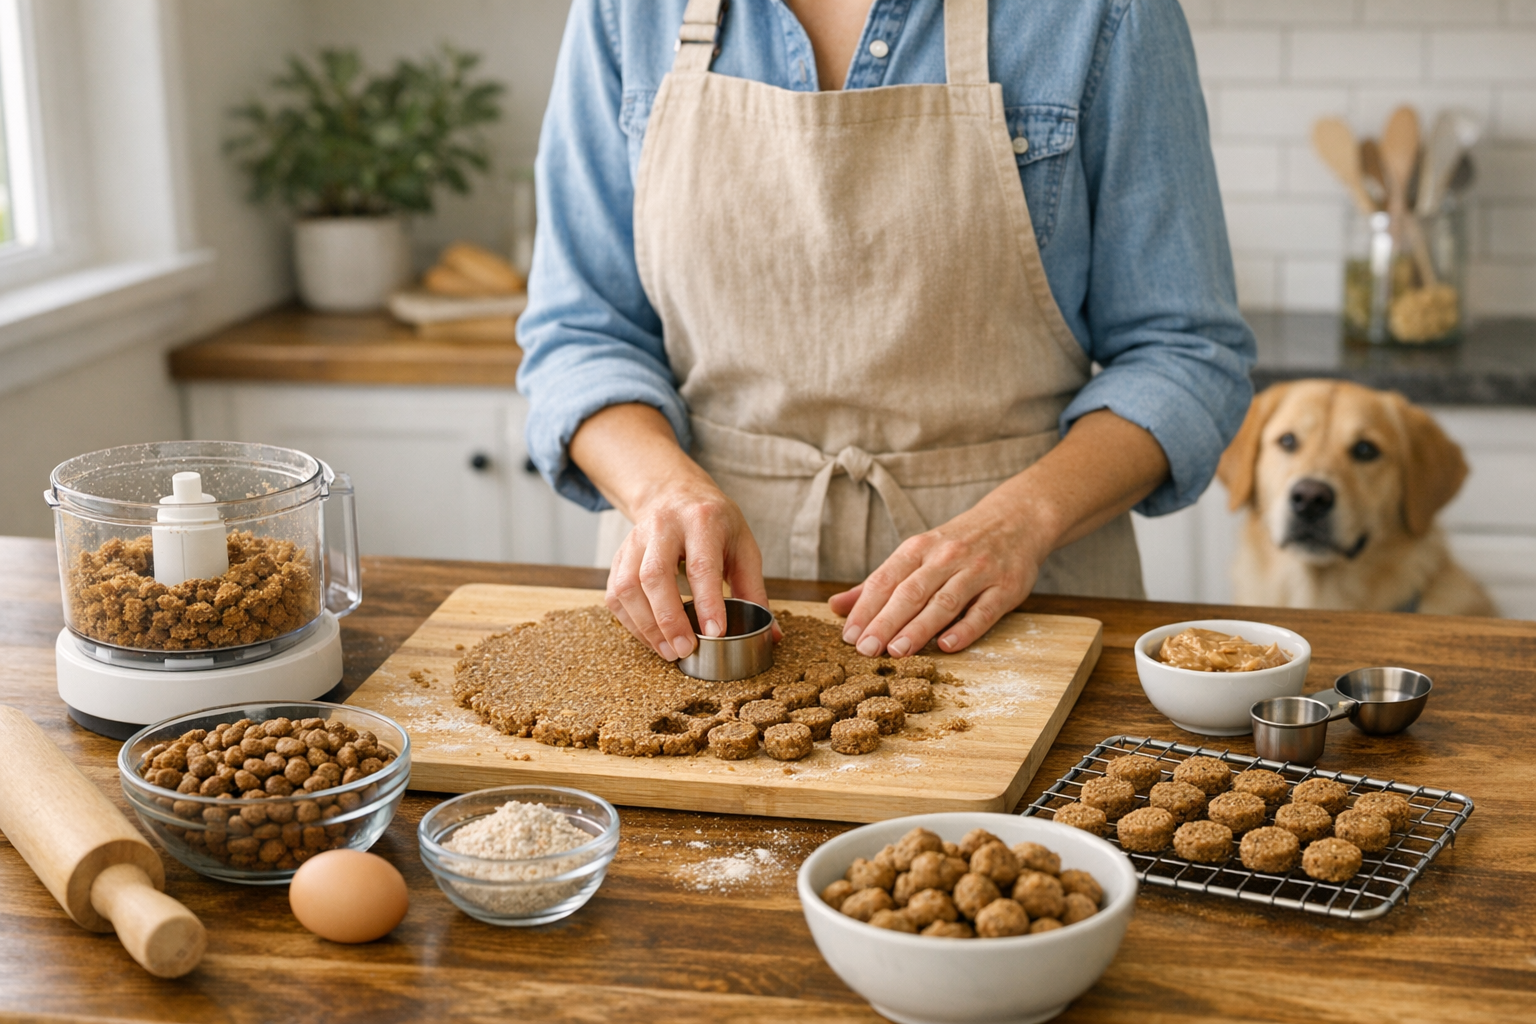
Making treats from dry food is surprisingly similar to baking standard cookies. You are simply creating a flour out of the protein-rich pellets. You do not need many tools. A high-speed blender or food processor is the most important piece of equipment.
Step 1: Grind the kibble. / Place two cups of your dog’s dry food into a blender. Pulse until it reaches the consistency of a fine powder or flour.
Step 2: Add your liquid. / Transfer the powder to a mixing bowl. Slowly add about one cup of warm water while stirring. You want a dough that is tacky but not sticky.
Step 3: Shape the treats. / Roll the dough out on a flat surface. You can use a small cookie cutter or simply pinch off marble-sized pieces and flatten them with a fork.
Step 4: Bake. / Place the pieces on an ungreased cookie sheet. Bake at 350 degrees Fahrenheit for approximately 30 minutes.
Step 5: Cool and store. / Let the treats cool completely on a wire rack. They will harden as they cool, giving them that satisfying crunch dogs love.
Key Takeaway: Grinding kibble into flour allows you to control the size and texture of the reward while ensuring the ingredients are 100% safe for your dog's specific diet.
Enhancing the Flavor and Texture
Plain water works well as a binder. However, if your dog is not on a strict medical diet, you can use other liquids to make the treats more enticing. Low-sodium chicken or beef broth is a popular choice. Just ensure the broth does not contain onions or garlic, as these are toxic to dogs.
You can also use a small amount of canned food as a binder instead of water. If you use a 75/25 ratio of dry food powder to wet food, the dough becomes much more aromatic. This is particularly helpful for senior dogs who might have a declining sense of smell. At our warehouse in Vernon Hills, we often recommend this "mix and match" approach for owners who use both types of food from the same brand line.
Using Dog-Safe Purees
If your veterinarian allows it, adding a tablespoon of plain canned pumpkin or unsweetened applesauce can improve the dough's consistency. Pumpkin is excellent for digestion. It provides a bit of fiber and helps the treats stay together during the shaping process.
The Toaster Oven Method
If you only want to make a small batch, a toaster oven is perfect. It heats up faster than a full-sized oven and uses less energy. Keep a close eye on the treats, as they can burn quickly in a smaller space. Flipping them halfway through the baking process ensures they are evenly dried out.
Training-Sized Rewards
One of the best benefits of DIY treats is the ability to make "micro-treats." Store-bought biscuits are often too large for repetitive training. When you make your own, you can roll the dough into tiny pearls. This allows you to give twenty rewards during a training session without overfeeding your dog.
Managing Prescription Diets
Many dogs require specialized food for weight management, skin issues, or urinary health. Our pet pharmacy carries many of these FDA-approved prescription pet foods through our partnership with Pet's Choice. If your dog is on a diet like Farmina Vet Life, you know how vital it is to stay consistent.
When making treats from prescription kibble, do not add any outside ingredients like peanut butter or eggs without asking your vet. Even a small amount of fat can be dangerous for a dog with pancreatitis. In these cases, stick strictly to the kibble-and-water method.
Vet Tip: Always consult your veterinarian before adding "extra" ingredients like pumpkin or broth to treats if your dog is on a prescription diet for a specific health condition.
Handling Different Kibble Types
Not all kibble is created equal. Some brands use more starches, while others are higher in protein and fat. This affects how the "flour" behaves when you add water.
- Grain-Free Kibble: These often use peas or lentils. The flour may feel a bit grittier. You might need slightly more water to get it to stick together.
- High-Protein/High-Fat Kibble: These can feel oily when ground up. You might find you need less water.
- Large Breed Kibble: These pellets are often very hard. You may need to pulse the blender longer to get a fine powder.
If the dough is too crumbly, add water one tablespoon at a time. If it is too mushy, add a bit more kibble powder. The goal is a consistency similar to play dough.
Storage and Safety Guidelines
Because these treats contain no artificial preservatives, they do not have the same shelf life as a sealed bag of commercial snacks. You must treat them like fresh food.
- Refrigeration: Store your baked treats in an airtight container in the fridge. They should stay fresh for five to seven days.
- Freezing: If you make a large batch, these treats freeze beautifully. They can last up to three months in the freezer. You can even give them to your dog while they are still frozen for a cold summer snack.
- The 10% Rule: Even though these treats are made from your dog's regular food, they should still be counted as part of their daily caloric intake. Most vets recommend that treats make up no more than 10% of a dog's total daily calories.
- Heating and Nutrition: Be aware that baking the food twice (once by the manufacturer and once by you) can slightly alter some vitamins. This is why these should remain treats rather than a primary meal replacement.
Key Takeaway: Treat your homemade creations like fresh leftovers. Keep them cold and use them within a week to ensure they stay safe for your pet.
Equipment for the Best Results
You do not need a professional kitchen to succeed at this. However, a few specific items make the process much smoother.
- High-Power Blender: Brands like Vitamix or Ninja are excellent for pulverizing hard kibble.
- Coffee Grinder: If you only need a handful of treats for a walk, a dedicated coffee grinder is a quick way to make a small amount of kibble flour.
- Silicone Baking Mats: These prevent the treats from sticking without needing to use oil or butter.
- Parchment Paper: If you do not have a silicone mat, parchment paper is a must. It makes cleanup easy and keeps the treats from burning on the bottom.
Troubleshooting Common Problems
Sometimes the first batch does not come out perfectly. Here is how to fix common issues.
The Treats Are Too Soft
If the treats feel spongy or soft after 30 minutes, they likely still have too much moisture inside. Soft treats are fine for immediate use, but they will mold quickly in the fridge. To fix this, turn the oven down to 250 degrees Fahrenheit and let them "dry out" for another 20 minutes.
The Dough Is Too Sticky
If the dough is sticking to your hands or the rolling pin, you have added too much water. Add a little more kibble powder. You can also try chilling the dough in the fridge for 30 minutes before you try to shape it. Cold dough is much easier to handle.
The Treats Are Crumbly
If the treats fall apart as soon as you touch them, you need a better binder. If your dog can handle it, an egg is a fantastic binder that adds extra protein. If they cannot have eggs, try a tablespoon of plain, non-fat Greek yogurt.
Integrating Treats Into Training
Once you have your custom treats, you can use them to reinforce good behavior. Since these treats have the same nutritional profile as your dog's dinner, you can be more generous with them during training sessions.
If you are working on a difficult task like "stay" or "heel," use the treats when they are still warm from the oven. The scent will be much stronger, making them more valuable to your dog. For routine commands like "sit" or "paw," the cooled, crunchy versions are perfectly fine.
We often suggest keeping a small pouch of these on your belt during walks. This is especially helpful for dogs that are reactive to other pets or people. Having a high-volume supply of their own food in treat form allows you to distract them consistently without causing an upset stomach from overfeeding rich snacks.
The Role of Quality Ingredients
The quality of your DIY treats depends entirely on the quality of the dry food you start with. At BaxterBoo, we pride ourselves on carrying 500+ trusted brands. Whether you use grain-inclusive options or specialized formulas, starting with a premium brand ensures your homemade treats are packed with nutrition.
If you are using a brand like NutriSource or our Stella & Chewy's selection, the ingredient list is already clean. You are simply changing the form factor. This gives you peace of mind that there are no hidden fillers, dyes, or artificial flavors in your dog's snacks.
Considering Senior Dogs
Senior dogs often have dental issues that make hard kibble difficult to chew. By grinding the food and adding more water, you can bake these treats for a shorter time to create a "soft-baked" texture. This allows your older dog to enjoy the same rewards as a younger pup without straining their teeth or gums.
For Puppies
Puppies are in a constant state of learning. They need frequent rewards. However, their small tummies can easily get upset by rich, fatty treats. Making treats from their puppy-specific kibble ensures they get the extra DHA and calcium they need for growth while they learn their basic manners.
Bottom line: Customizing the size and hardness of your homemade treats makes them suitable for every life stage, from teething puppies to seniors with dental sensitivity.
Practical Next Steps
Ready to start baking? Check your pantry first. If you are running low on your dog's favorite kibble, you can set up our Autoship programme through us to save on every order. This ensures you always have enough food on hand for both meals and treat-making sessions.
If your dog is managing a health condition, remember to visit our MVP Rewards programme. We offer a wide range of prescription diets and medications through our Pet's Choice partnership. Having your food delivered directly to your door makes it easier to keep your kitchen stocked for these DIY projects.
FAQ
Can I make these treats in a microwave?
Yes, you can make a faster version in the microwave. After shaping your dough into small pieces, place them on a microwave-safe plate and cook for two to three minutes. The texture will be more "chewy" than "crunchy," so they should be eaten within a day or two or kept in the freezer.
Is it safe to bake prescription dog food?
Most prescription diets can be safely baked into treats, but there are a few exceptions. Always check with your veterinarian or the food manufacturer first. Some high-moisture or very specific veterinary diets may lose certain nutritional properties if heated to high temperatures.
How many treats can I give my dog per day?
While these treats are made from their regular food, you should still follow the 10% rule. Treats should not exceed 10% of their daily calories. If you give a lot of treats during the day, simply reduce the amount of food you put in their bowl at dinner time to compensate.
Can I add peanut butter to the recipe?
You can add a small amount of natural peanut butter if your dog does not have weight issues or pancreatitis. Ensure the peanut butter is free from xylitol, which is a sweetener that is highly toxic to dogs. Always check the ingredient label for "birch sugar" or xylitol before sharing.