Save 15% on your 1st Autoship learn more

 Email us
 Live Chat
 FAQs
FAQs





Introduction
Walking down the specialty pet food aisle can be a surprising experience. You see bags of air-dried food that look like jerky, but the price tag often feels more like a luxury item than a daily meal. Many dog owners want the nutritional benefits of raw food without the mess or the high cost of commercial air-dried brands. At BaxterBoo, we know that providing top-tier nutrition is a priority for your family, even when you are on a budget. This post covers the specific equipment, safety protocols, and step-by-step instructions for making air-dried food in your own kitchen. By doing it yourself, you control every ingredient that enters your dog’s bowl. You can provide a high-protein, nutrient-dense diet that supports their energy and long-term wellness.
Understanding the Air-Drying Process
Air-drying is a preservation method that uses a gentle flow of warm air to remove moisture. This process is very different from the way standard kibble is made. Most kibble is cooked at extremely high temperatures and pressures. This high heat can break down delicate vitamins, minerals, and natural enzymes. Air-drying keeps the temperature low enough to preserve those nutrients while still making the food shelf-stable.
When you air-dry food at home, you are essentially mimicking the way food was preserved for centuries. The goal is to remove enough water so that bacteria and mold cannot grow. Because the water is gone, the food becomes much lighter and more concentrated. A small piece of air-dried meat has the same nutritional value as a much larger piece of raw meat. This makes it a great option for dogs who need a lot of energy but have small appetites.
Quick Answer: To air-dry dog food at home, slice lean meats and vegetables thinly and place them in a dehydrator at 145°F to 165°F for 10 to 14 hours. This low-heat process removes moisture while preserving essential nutrients, creating a shelf-stable, jerky-like meal or topper.
Why Choose DIY Air-Dried Food?
The primary reason many owners switch to DIY air-dried food is ingredient transparency. When you buy a commercial bag, you have to trust the label. When you make it yourself, you see exactly what goes into the mixture. You can choose grass-fed beef, organic poultry, or specific vegetables that your dog loves. This is especially helpful if your dog has sensitivities to common fillers like corn, soy, or wheat.
Cost is the second major factor. Commercial air-dried brands are expensive because the process takes a long time. By using your own dehydrator or oven, you are only paying for the ingredients and a small amount of electricity. Many people find they can produce high-quality food for about half the price of the premium brands. It also allows you to buy meat in bulk when it is on sale, which further increases your savings.
For ready-made alternatives, browse our dog food category to compare commercial formulas and toppers.
Essential Equipment for Home Drying
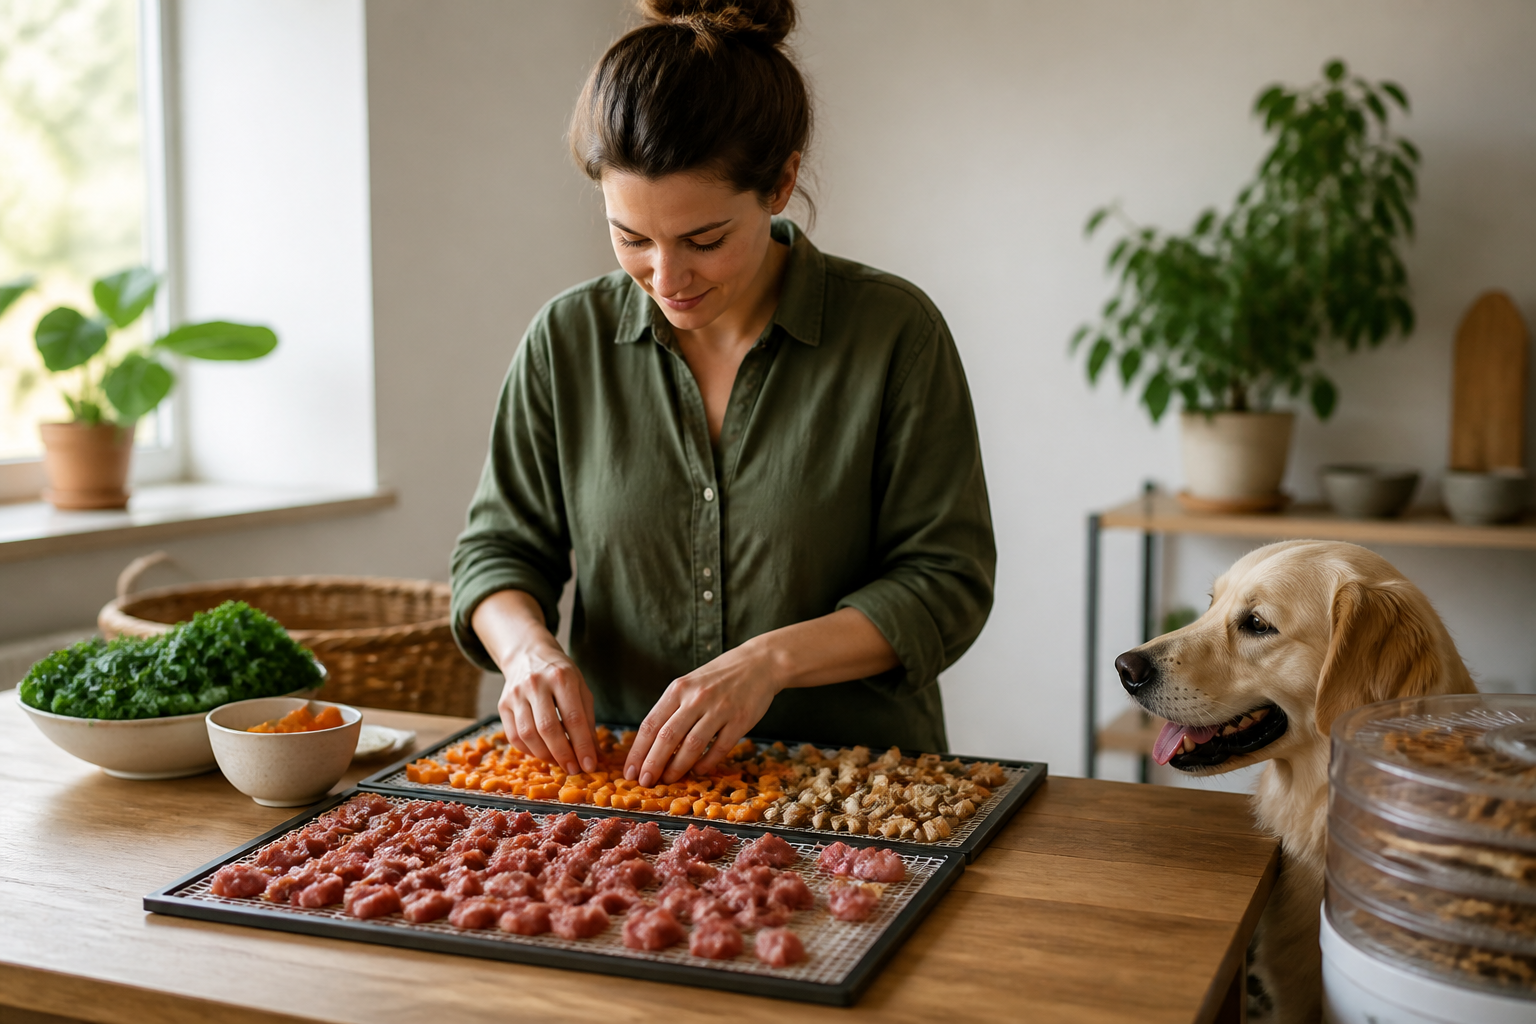
You do not need a professional kitchen to start air-drying dog food. However, a few specific tools will make the process much easier and safer. The most important tool is the heat source. While some people use a standard kitchen oven, a dedicated food dehydrator is usually better.
The Food Dehydrator
A dehydrator is designed to run for many hours at a consistent, low temperature. It has a fan that circulates air evenly across several trays. This even airflow is crucial for preventing "case hardening." This is a situation where the outside of the food dries too fast, trapping moisture inside and leading to spoilage. Look for a model with an adjustable thermostat that reaches at least 165°F.
Preparation Tools
Slicing meat by hand can be difficult if you want consistent results. Thin, even slices dry much faster and more reliably than thick, uneven chunks. A mandoline slicer or a very sharp chef's knife is essential. Some owners prefer to use a meat grinder. Grinding the meat allows you to mix in organs and vegetables thoroughly before shaping the mixture into small "nuggets" or strips for drying.
Storage Supplies
Once the food is dry, you need to keep it away from oxygen and moisture. Glass jars with tight-sealing lids or BPA-free plastic containers are good choices. For long-term storage, some people use vacuum sealers. These machines remove all the air from a bag, which can extend the shelf life of your homemade food by several months.
Selecting the Best Ingredients
A balanced dog food recipe is about more than just muscle meat. While protein is the foundation, your dog needs a variety of nutrients to stay healthy. A common guideline for air-dried recipes is the 80-10-10 rule. This includes 80% muscle meat, 10% organ meat, and 10% fruits or vegetables.
Choosing Your Proteins
Always look for lean cuts of meat. Fat does not dry out. Instead, it turns rancid and can cause the food to spoil quickly. Good options include:
- 90% lean ground beef or top round
- Chicken breast (skinless and boneless)
- Turkey breast
- Venison or bison
- White fish like cod or tilapia
The Importance of Organs
Organ meats are nature's multivitamins. They are packed with vitamin A, B vitamins, and essential minerals like iron and phosphorus. Beef liver, chicken hearts, and kidneys are excellent additions. Because organs are so rich, they should only make up a small portion of the total recipe. Too much liver can cause digestive upset or vitamin toxicity over time.
Adding Vegetables and Fruits
Vegetables provide fiber and antioxidants. However, dogs have a hard time digesting raw, fibrous vegetables. It is best to steam or blanch vegetables like carrots, spinach, or green beans before adding them to your meat mixture. This breaks down the cellulose walls and makes the nutrients more accessible. Blueberries and sliced apples (without seeds) are also great for a boost of natural antioxidants.
Key Takeaway: Success in air-drying starts with lean ingredients. Fat is the enemy of shelf-stability, so trim every bit of visible fat from your meats to ensure the food stays fresh and safe for your dog.
Step-by-Step Guide to Air-Drying
Making a batch of food takes a bit of preparation time, but the dehydrator does most of the hard work. Follow these steps to ensure a safe and consistent result.
Step 1: Prepare the meat and vegetables.
Trim all visible fat from your protein sources. If you are using whole muscle meat, slice it into strips about a quarter-inch thick. If you are using ground meat, mix it in a large bowl with finely chopped organs and steamed vegetables.
Step 2: Shape and arrange the food.
Place your meat strips or ground meat patties onto the dehydrator trays. Ensure there is plenty of space between each piece. Do not let the pieces overlap, as this will block the airflow and result in damp spots.
Step 3: Set the temperature for safety.
If you are using poultry, set the dehydrator to 165°F. For beef or lamb, 150°F to 155°F is generally sufficient. These temperatures are high enough to kill common pathogens like Salmonella without "cooking" the food in a traditional sense.
Step 4: Monitor the drying time.
Most batches will take between 10 and 14 hours. The food is done when it feels leathery and firm. When you bend a piece, it should crack slightly but not snap like a cracker. It should not feel soft or squishy in the center.
Step 5: Cool the food completely.
This is a vital step that many people skip. If you put warm food into a container, it will create condensation. This moisture will cause the food to mold within days. Let the food sit on the trays at room temperature for at least two hours before packing it away.
For another perspective on preparing homemade dry food, read our guide to making homemade dry dog food.
Safety and Pathogen Control
Handling raw meat always carries a small risk of bacterial contamination. This is why temperature control is so important. Some people worry that low-heat drying is not enough to make the food safe. If you have concerns about pathogens, you can pre-heat your meat in a standard oven at 275°F for about 10 minutes before moving it to the dehydrator. This provides an extra layer of safety.
Vet Tip: Always consult your veterinarian before switching your dog to a completely homemade diet. They can help you ensure the recipe is balanced for your dog's specific life stage and health needs. If your dog has a chronic condition like kidney disease or severe allergies, our pharmacy offers prescription diets through our partnership with Pet's Choice that may be a safer alternative to DIY options.
If you notice any off-smells or fuzzy growth on your stored food, throw the entire batch away. It is not worth the risk of food poisoning. Clean your dehydrator trays thoroughly with hot, soapy water after every use to prevent cross-contamination between batches.
Storage Protocols for Homemade Food
Because your homemade air-dried food does not contain chemical preservatives, it has a shorter shelf life than commercial kibble. Proper storage is the only way to keep it safe and nutritious.
- Pantry Storage: If the food is properly dried and kept in an airtight container, it can last in a cool, dark pantry for about two weeks.
- Refrigeration: For extra safety, keep your current batch in the refrigerator. It will stay fresh for up to four weeks.
- Freezing: This is the best option for large batches. Air-dried food freezes very well. You can store it in the freezer for up to six months. Just take out a few days' worth at a time and let it thaw in the fridge.
Using a moisture absorber packet, like the ones found in beef jerky bags, can also help. These small silica packets pull any remaining moisture out of the air inside your storage container.
For additional storage guidance, see how long dry dog food stays fresh.
Bottom line: Divide your batch into smaller portions and freeze what you won't use within ten days to maintain the best nutritional quality.
Transitioning Your Dog to Air-Dried Food
Air-dried food is very calorie-dense. Because the water is gone, the food is much more concentrated than what your dog is likely used to eating. If you feed the same volume of air-dried food as you did kibble, your dog will quickly become overweight.
Start by introducing the new food as a topper. Replace about 25% of their regular meal with the air-dried version. Watch their digestion over the next few days. If their stool remains firm and they have plenty of energy, you can slowly increase the amount over a week or two.
Some dogs may need extra hydration when eating a dry diet. You can always add a splash of warm water or low-sodium bone broth to the bowl. This softens the food and ensures your dog is getting enough fluids, which is especially important for senior dogs or those with a history of urinary issues.
For another approach to incorporating minimally processed food, read how to feed freeze-dried dog food.
Managing Special Dietary Needs
While DIY air-drying is a great way to handle general health, some dogs have medical requirements that a home kitchen cannot easily meet. If your veterinarian has prescribed a specific diet for weight management, skin issues, or organ support, it is important to follow those instructions carefully.
We carry a variety of trusted brands that offer specialized nutrition. For example, Farmina Vet Life and Royal Canin provide formulas specifically designed for dogs with unique health challenges. If your dog requires a prescription diet, our pharmacy can help you fulfill that need through our partnership with Pet's Choice. This ensures you get the exact nutrient balance your dog requires to manage their condition.
For healthy dogs without these restrictions, air-dried treats are a fantastic way to reward them during training. They are highly palatable and easy to break into small pieces. Since they are just meat and vegetables, you don't have to worry about the "empty calories" found in many processed treats.
Cost Comparison and Value
Many owners find that the initial investment in a dehydrator pays for itself within the first few months. When you look at the price per ounce, homemade air-dried food is often cheaper than high-end canned food and much cheaper than commercial air-dried bags.
You can also take advantage of our MVP Rewards program at BaxterBoo to save on the ingredients and tools you might need. Earning points on every purchase helps offset the cost of your pet care routine. If you find that you prefer the convenience of ready-made food, our Autoship program offers savings on recurring deliveries of your favorite brands.
Conclusion
Making air-dried dog food at home is a rewarding way to take control of your pet's nutrition. It offers the high-protein benefits of a raw diet with the convenience of a shelf-stable product. By selecting lean meats, including essential organs, and following strict drying temperatures, you can create a safe and delicious meal for your dog.
Key Takeaways for Home Drying:
- Use a dedicated dehydrator for the most consistent and safe results.
- Always use lean meats to prevent the food from going rancid.
- Follow the 80-10-10 rule to ensure a balanced nutritional profile.
- Store food in airtight containers and freeze large batches for longevity.
- Always transition your dog slowly to prevent digestive upset.
If you are ready to start improving your dog's diet but need help with specialized nutrition or medications, visit our dog pharmacy to see how we can support your pet's ongoing health needs.
FAQ
Is air-dried dog food the same as dehydrated dog food?
The terms are often used interchangeably, but there is a slight difference in the process. Dehydration typically uses higher heat to remove moisture quickly, while air-drying uses lower temperatures and more air circulation over a longer period. Air-drying is generally considered better for preserving delicate enzymes and nutrients that can be damaged by the higher temperatures of standard dehydration.
Do I need to add water to air-dried food before feeding?
You do not have to add water, as air-dried food is designed to be eaten as is. However, adding a bit of warm water or broth can be beneficial for dogs who do not drink much or for seniors who prefer a softer texture. Rehydrating the food can also help your dog feel fuller if you are trying to manage their weight with smaller portions.
Can I air-dry dog food in a regular kitchen oven?
Yes, you can use an oven if it has a very low temperature setting, ideally around 150°F to 170°F. However, most ovens do not circulate air as well as a dehydrator, which can lead to uneven drying. If you use an oven, you may need to prop the door open slightly with a wooden spoon to allow moisture to escape and turn the trays frequently.
How long does homemade air-dried dog food stay fresh?
Since it lacks artificial preservatives, homemade air-dried food lasts about two weeks in a pantry if kept in a cool, dry place. It can last up to a month in the refrigerator and up to six months in the freezer. Always check for any signs of mold or unusual odors before feeding a batch to your dog, as moisture can sometimes find its way back into the container.